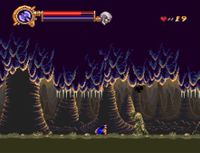
Dracx/stage4'
From Castlevania Speedrunning
 | |
| Game | Castlevania: Dracula X |
|---|---|
| Previous level | Stage 3 |
| Next level | Stage 5 |
Safe
Notes:
- At 0:20, do the axe knight boost.
- Jump once at the start of the room and use the dagger on landing to kill the skeleton, then jump two more times. You can whip the candle on the third jump if it hasn't gotten destroyed by the dagger.
- Make sure you haven't taken any considerable slowdowns so far or the timing of the axe knight's charge will be off.
- Use an item crash as soon as you collect the axe, and whip cancel the landing from said item crash. You then want to reposition Richter to the left edge of the small hill he's standing on.
- When the knight above lowers his axe, jump left.
- Jump once at the start of the room and use the dagger on landing to kill the skeleton, then jump two more times. You can whip the candle on the third jump if it hasn't gotten destroyed by the dagger.
- Start moonwalking from 0:35 to prevent as many bats as possible from spawning. Backflip over the bat at 0:38. You can turn around for a split second at 0:40 to ship cancel the landing, but start moonwalking again immediately afterwards. Use an axe at 0:45 to kill the bat from the left.
- Skip the miniboss at 0:51. Jump when Richter is in front of the candle, the tap left in mid-air to turn around and go for a high backflip. If done correctly you'll take a boost on its right side and be able to move on.
- Damage boosting on the spikes speeds up the long mud hallway a bit and also prevent certain enemies from spawning. The timing can be pretty precise though, so if you don't feel too confident you can skip them.
Optimal
Notes:
- You can fit in an extra jump at 0:09. If on the way there you feel like your jumps weren't quick enough to be able to perform it, you can hold down-right on the dpad while jumping to prevent Richter from moving in-between jumps and give yourself more time.
- Boost off the bat at 1:03. You can again hold down-right on the way there to be able to do all three jumps.
- The spikes section is played a bit riskier.
NEW 4-6 Route
- This saves a little under 0.5 sec over previous route
- Instead of hitting both candles on the top right with a whip, you can sacrifice an axe for more consistency
Boss
Notes:
- This fight is a juggle. Start by firing off an axe as the boss is starting to form, the objective is to make sure that the axe is inside his hitbox when he becomes vulnerable.
- You can use the boss's health bar filling up as a visual cue for when to use the first axe.
- After each hit, face the other direction, do a neutral jump and fire off an axe with a rhythm. Repeat until phase 1 is over.
- For phase 2, you can get the kill with only 6 axes. Fire off axe #1 just before the boss has finished forming, then delay axes #3 and #5 a bit.
- You can also just fire off 7 axes without really minding the rhythm which usually do the job.
- A similar buffer setup to the stage 2 one is used to grab the orb (3 jumps and 1 whip into a forward jump)