Dracx/stage5
From Castlevania Speedrunning
 | |
| Game | Castlevania: Dracula X |
|---|---|
| Previous level | Stage 4' |
| Next level | Stage 6 |
Safe
Notes:
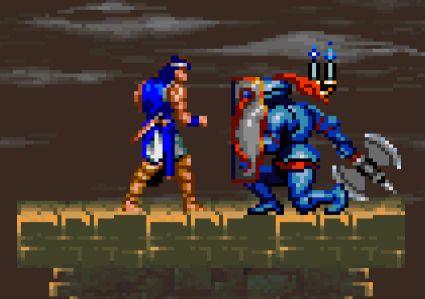
- Walk a bit to the right at the start of the stage, then item crash to trigger the axe knight. When you stand back up from the fall, backflip to get boosted up.
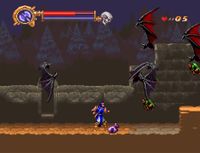
- Fleamen alley is mostly an improvisation. Every bat comes at a random height, the fleamen's movements are completely random, and after the lone fleaman near the start even the side and the delays at which the bats spawn are random. At the end, three bats usually spawn all from the right side close from each other.
- As a safer route, it is recommended to avoid jumping unnecessarily as it usually puts you at risk of getting hit.
- If you can, throw 2 axes for the lone fleaman at 0:11, and whip on landing. It's not a 100% guarantee to kill it, but more often than not it does.
- For the fleaman at 0:28, jump-throw an axe while close to the stairs. If the fleaman dodges the axe to the right, or jumps above the axe, quickly throw a second axe while grabbing the stairs. If instead it dodges the axe from below, use the whip to try to kill it. Again, not a 100% guarantee to kill it, but more often than not it does the job.
- Positioning during the vertical climb (screen3) has to be followed pretty closely to the video, else the bird patterns might be different.
- At 0:57, delay the last jump on the top floor until you're vertically past the knight on the bottom. Most of the times, he should take a step to the right and stop there to attack you.
- If he takes a step to the left instead (more rare), follow the backup video below.
- Whip when the knight gets into the correct position to make him stop moving, then get close and boost.
- Boost over the knight at 1:22. To do this you have to jump close to the edge of the platform. You can kill him if you're not comfortable with this, but an optimal kill can be riskier due to potentially getting two different patterns.
- Grab the stopwatch.
Bad spear pattern backup
Optimal
Notes:
- Jump as much as you can in fleamen alley. You can take as many as two hits before having to skip boosts later in the stage.
- Follow the strats for the lone fleamen near the start and near the end of the stage described under the Safe strats section.
- You can kill the bird at 0:30 with the back of the whip (somewhat precise).
- At 0:33, perform a max height backflip to get on top of the moving platform (saves ~2.5 seconds).
- At 0:39, initiate a neutral jump, then tap right, then whip, in that order, to get right momentum while whipping. Sometimes the bird gets killed during the axe throw, but this ensures he never gets in the way.
- At 0:41, perform another max height backflip to skip a ledge (saves ~1 second).
- This is a minimal time save and therefore easily skippable.
- Skip both axe knights at 1:07.
- To skip the first one, make sure that you're landing from your jump somewhere around the candle right before him, then whip once to set up the timing and grab the heart in the process. Jump close to the edge, whip again, and backflip from around the position in the picture below.
Boss
Notes:
- Use a stopwatch item crash to try to get a quick kill on him
- This boss has a myriad of different patterns. Try to follow him as best as you can, and preemptively crouch to dodge both his fists and his flame attack.
- Try to hit the boss with the inner part of the circle of watches, which can send him to your back and can potentially set up into a juggle with good rng.
- If he starts the fight by backing off, then it's pretty much unavoidable that the outer part will hit him, which will send him further back. Jump after him if this happens.
- Is he stands idle for a long time, that means he's preparing a slide kick which you generally want to jump above (Unless you have a lot of health in which case you can just tank it).
- If he gives you a bad pattern and the item crash expires too soon, you can activate a second one which will almost always finish him off. You will have to grab additional hearts at the end of stage 6 to make up for the extras used.
Bad pattern
