Difference between revisions of "Cv4/stage6"
From Castlevania Speedrunning
m (→1 Cycle Chandelier Tutorials + Setup) |
Bogaabogaa (talk | contribs) (→Chair Damage Boosts) |
||
| (18 intermediate revisions by 2 users not shown) | |||
| Line 9: | Line 9: | ||
== Safe Route == | == Safe Route == | ||
| − | |||
| − | |||
{{#ev:youtube|kyozw5b0QK0|560}} | {{#ev:youtube|kyozw5b0QK0|560}} | ||
| Line 17: | Line 15: | ||
=== 2 Cycle Chandeliers === | === 2 Cycle Chandeliers === | ||
{{#ev:youtube|mOYfYpAI2WQ|560||}} | {{#ev:youtube|mOYfYpAI2WQ|560||}} | ||
| + | '''Notes:''' | ||
| + | *Learning the 2 cycle chandeliers, while has it's risks, is a good foundation for learning 1 cycle later on. | ||
== Optimal Route == | == Optimal Route == | ||
| − | |||
| − | |||
| − | |||
| − | |||
{{#ev:youtube|OSKUJQp36cg|560}} | {{#ev:youtube|OSKUJQp36cg|560}} | ||
| − | == | + | == Tutorials == |
| + | |||
=== 1 Cycle Chandelier Tutorials + Setup === | === 1 Cycle Chandelier Tutorials + Setup === | ||
<div class="toccolours mw-collapsible mw-collapsed" style="width:560px"> | <div class="toccolours mw-collapsible mw-collapsed" style="width:560px"> | ||
| − | ''' | + | '''Original 1 Cycle Set-Up''' |
<div class="mw-collapsible-content">{{#ev:youtube|oqe8zM3APLk|560}} | <div class="mw-collapsible-content">{{#ev:youtube|oqe8zM3APLk|560}} | ||
| + | '''Notes''' | ||
| + | *This showcases the original set-up for 1 cycle chandeliers. While it is possible to do this method, it is much tighter to pull off consistently. | ||
</div> | </div> | ||
</div> | </div> | ||
| + | |||
<div class="toccolours mw-collapsible mw-collapsed" style="width:560px"> | <div class="toccolours mw-collapsible mw-collapsed" style="width:560px"> | ||
| − | '''1 Cycle Twocat Set-Up''' | + | '''1 Cycle Twocat Set-Up (Modern)''' |
<div class="mw-collapsible-content">{{#ev:youtube|LUsuZzcE134|560}} | <div class="mw-collapsible-content">{{#ev:youtube|LUsuZzcE134|560}} | ||
| + | '''Notes:''' | ||
| + | *This is the modern version of the 1 cycle chandeliers and is the most consistent method. | ||
</div> | </div> | ||
</div> | </div> | ||
| + | |||
<div class="toccolours mw-collapsible mw-collapsed" style="width:560px"> | <div class="toccolours mw-collapsible mw-collapsed" style="width:560px"> | ||
| − | ''' | + | '''1 Cycle Modern Tutorial (by jay_cee)''' |
<div class="mw-collapsible-content">{{#evt: service=twitchvod|id=418463386|dimensions=560|urlargs=autoplay=false&parent=castlevaniaspeedruns.com}} | <div class="mw-collapsible-content">{{#evt: service=twitchvod|id=418463386|dimensions=560|urlargs=autoplay=false&parent=castlevaniaspeedruns.com}} | ||
| + | '''Notes:''' | ||
| + | *Tutorial using the modern 1 cycle set-up. | ||
</div> | </div> | ||
</div> | </div> | ||
| − | === 6-2 | + | == Visual Guides == |
| + | |||
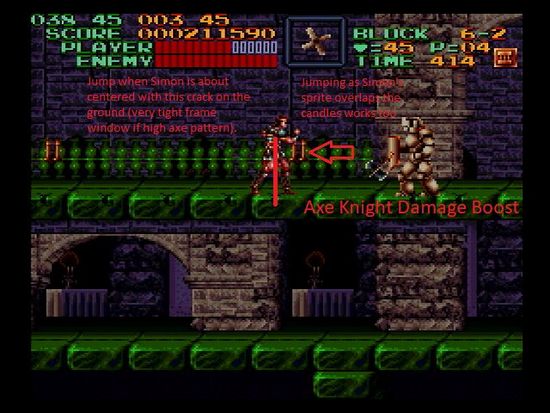
| + | === Axe Knight Damage Boost === | ||
| + | |||
| + | [[File:Stage 6-2 Axe Knight Boost.jpg|550px]] | ||
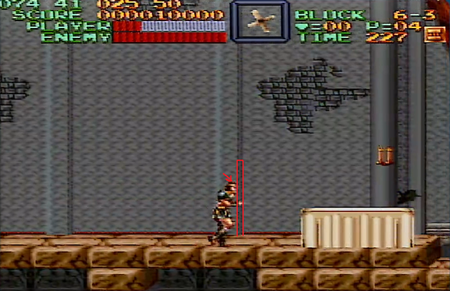
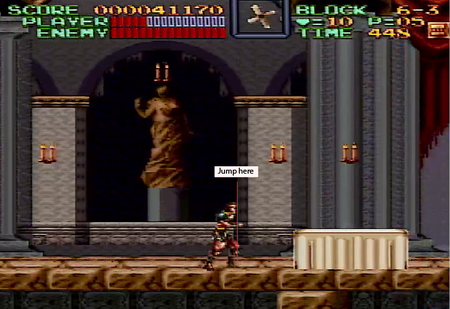
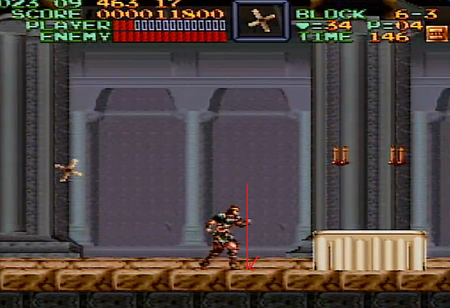
| − | + | === Chair Damage Boosts === | |
| − | + | {{#ev:youtube|xikDYJaJPa8|560||}} | |
| − | + | [[File:visualcue1.png|450px]] [[File:visualcue3.png|450px]] [[File:visualcue2.png|450px]] | |
| − | + | == Optimal Alternative Strats == | |
| − | |||
| − | |||
| − | == | + | === Axe Knight Boost 6-2-1 === |
| − | + | {{#ev:youtube|wJUi09eNW6c|560||}} | |
| − | {{#ev:youtube| | ||
| − | |||
| − | |||
=== Axe Knight Boost === | === Axe Knight Boost === | ||
{{#ev:youtube|77Q-3aSnYVo|560||}} | {{#ev:youtube|77Q-3aSnYVo|560||}} | ||
'''Notes:''' | '''Notes:''' | ||
| − | * Compare Skelly Spike boost to Axe Knight boost | + | *Compare Skelly Spike boost to Axe Knight boost |
| − | * Axe Knight does save 5 Frames | + | *Axe Knight does save 5 Frames |
| + | *Doing this boost would cost (3HP) over doing an axe boost (2HP) | ||
| + | *A more up do date routine would probably consider the chair boost at the end of the stage over this) | ||
| + | |||
| + | == Boss: Dancers == | ||
| + | |||
| + | [Video] | ||
Latest revision as of 14:59, 1 June 2023
 | |
| Game | Super Castlevania IV |
|---|---|
| Level sections | 6-1, 6-2, 6-3 |
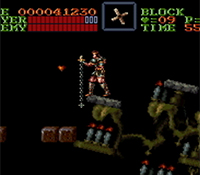
| Level name | Dance Hall |
| Previous level | Stage 5 |
| Next level | Stage 7 |
Contents
Safe Route
Intermediate Route
2 Cycle Chandeliers
Notes:
- Learning the 2 cycle chandeliers, while has it's risks, is a good foundation for learning 1 cycle later on.
Optimal Route
Tutorials
1 Cycle Chandelier Tutorials + Setup
Original 1 Cycle Set-Up
Notes
- This showcases the original set-up for 1 cycle chandeliers. While it is possible to do this method, it is much tighter to pull off consistently.
1 Cycle Twocat Set-Up (Modern)
Notes:
- This is the modern version of the 1 cycle chandeliers and is the most consistent method.
1 Cycle Modern Tutorial (by jay_cee)
Notes:
- Tutorial using the modern 1 cycle set-up.
Visual Guides
Axe Knight Damage Boost
Chair Damage Boosts
Optimal Alternative Strats
Axe Knight Boost 6-2-1
Axe Knight Boost
Notes:
- Compare Skelly Spike boost to Axe Knight boost
- Axe Knight does save 5 Frames
- Doing this boost would cost (3HP) over doing an axe boost (2HP)
- A more up do date routine would probably consider the chair boost at the end of the stage over this)
Boss: Dancers
[Video]
