Difference between revisions of "Cv4/stage1"
From Castlevania Speedrunning
(→1-3 Medusa Boosts) |
|||
| Line 50: | Line 50: | ||
<div class="toccolours mw-collapsible mw-collapsed" style="width:560px"> | <div class="toccolours mw-collapsible mw-collapsed" style="width:560px"> | ||
'''1-2 Wall Clip Tutorial (by jay_cee)''' | '''1-2 Wall Clip Tutorial (by jay_cee)''' | ||
| − | <div class="mw-collapsible-content">{{#evt: service=twitchvod|id=394702574|dimensions=560|urlargs=autoplay=false}} | + | <div class="mw-collapsible-content">{{#evt: service=twitchvod|id=394702574|dimensions=560|urlargs=autoplay=false&parent=castlevaniaspeedruns.com}} |
</div> | </div> | ||
</div> | </div> | ||
Revision as of 16:37, 28 March 2021
 | |
| Game | Super Castlevania IV |
|---|---|
| Level sections | 1-1, 1-2, 1-3 |
| Level name | Horse Stables |
| Previous level | None |
| Next level | Stage 2 |
Contents
Safe Route
A basic overview of the level if you're starting out with the game or want to know safer methods to finish the level.
Safe Strat 1-1 Video by JustDefend
Safe Strat 1-2 Video by JustDefend
Safe Strat 1-3 Video by JustDefend
Optimal Route
Top Splits and Time Saves comparison
Videos get outdated quick. Sometimes there are some top routes. This is why we referee to gold splits instead.
1-2 Ring Wall Clip Tutorials
1-2 Clip Tutorial (Joe)
Notes:
- 2 frame window (saves ~0.6sec)
1-2 Clip Tutorial (Hanage)
1-2 Clip Tutorial minimal input (bogaabogaa)
1-2 Wall Clip Tutorial (by jay_cee)
Pixels To Jump Into Transition
Notes:
- These are the 4 pixels where Simon can jump into the screen transition.
- This is only relevant when performing the wall clip.
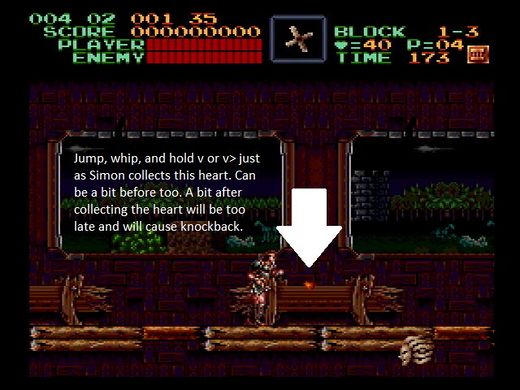
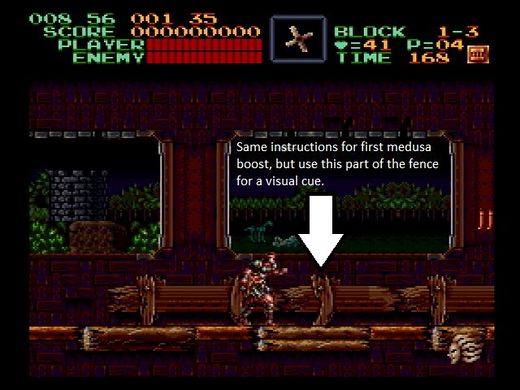
1-3 Medusa Boosts
Alternative Optimal Strategies
1-2 Ring-Room Full-Halfie
1-2 Ring Room Zip
Notes:
- 2 frame window. Much more difficult than wall clip, since you have to adjust during the swing to get the correct angle.
Stage 1 Route Improvement
Notes:
- This showcases an alternative bat strat

