Difference between revisions of "Cv1/level4"
From Castlevania Speedrunning
(Created page with "== Cave Skip == Tutorial by 2snek {{#ev:youtube|eA8cERKiVVQ|560}}") |
|||
| (25 intermediate revisions by 2 users not shown) | |||
| Line 1: | Line 1: | ||
| − | == Cave Skip == | + | {{Infobox level |
| − | + | | image = cv1level4.png | |
| − | {{#ev:youtube| | + | | game = Castlevania |
| + | | level_name = 4 | ||
| + | | level_sections = Stage 10, Stage 11, Stage 12 | ||
| + | | previous = [[cv1/level3 | Level 3]] | ||
| + | | next = [[cv1/level5 | Level 5]] | ||
| + | }} | ||
| + | |||
| + | == <span class="mw-customtoggle-0" style="font-size:large; display:inline-block; float:right;"><span class="mw-customtoggletext">[Show/Hide]</span></span> Stage 10 == | ||
| + | <div id="mw-customcollapsible-0" class="mw-collapsible mw-collapsed"> | ||
| + | |||
| + | === Stage 10 === | ||
| + | |||
| + | ==== Beginner route ==== | ||
| + | |||
| + | {{#ev:youtube|_p4uzLhckbo|550}} | ||
| + | |||
| + | * If you want to hold off on learning cave skip, the cave is somewhat straight forward. Simon will land and clunk, holding right to keep moving to the right - jump from the first platform to the second. The candle above the second platform will have a watch, this is useful to get in the habit of grabbing the watch for the cave skip but also to make the level easier. | ||
| + | |||
| + | * Jump from the platform to the moving platform and watch for fishmen and bats. If you move consistently from the clunk, you should just beat the fishmen and bats on the moving platform if you keep moving the fishmen will jump up from below behind you and as you approach the gap in between the platforms a bat will appear from the right. This bat as long as you are not jumping should appear at Simon's level and is easy to jump in stride. | ||
| + | |||
| + | * Jump up to the next two platforms, once you get to the highest one, break the second candle for the holy water. Drop down to the low platform, wait for the moving platform and whip the first bat that appears. Jump out to the moving platform, if you may or may not have another bat appear mid-jump or a fishman jump out of the water - be prepared, the pattern should be consistent but can be slightly different based on frames lost. | ||
| + | |||
| + | * Crouch down so you don't get knocked off of the moving platform by the hanging rocks, and watch for a bat to spawn from the right whip it once you can. Then jump up to the small elevated platform. Wait for the next moving platform, whip any fishmen that pose a threat, get on the moving platform and duck under the next hanging rocks. | ||
| + | |||
| + | * The moving platform will move towards another moving platform, jump up to that platform, whip the first candle you come to for five hearts and then throw a holy water at the next candle to get the whip upgrade if you do not have it already. Then jump to the next platform, and the following platform. There is a super troll-y bat after this platform - you can jump and whip or throw a water at it of just wait till it passes over Simon. | ||
| + | |||
| + | * Jump from that platform to ground and then jump up the platforms to reach the stairs and exit the cave. | ||
| + | |||
| + | ==== Cave Skip ==== | ||
| + | |||
| + | {{#ev:youtube| i_Xb59PWphU|550}} | ||
| + | |||
| + | * Once Simon lands, he will clunk. You need to wait for Simon to stand and then do 3 whips. The purpose of the whips is to lose 66 frames each whip is 22 frames. Whip while holding right, this will take some practice and while you can technically still make the moving platform by whipping once then taking a step, and doing this three times - it may be tough to catch the platform. | ||
| + | |||
| + | * Immediately after the third whip you want to jump and whip the candle in front of you to get the big heart, jump and whip to the next platform to pick up the watch and jump onto the moving platform. If you are having issues making this platform check that you are not spamming the whip button at the 3 whip pause buffer (this requires decent whip rhythm) or not trying to jump to the moving platform too early. | ||
| + | |||
| + | * Ride the moving platform, jump and whip the second candle to get another big heart, and jump to the next platform. Walk right and jump up and whip the second candle. You want to whip as you are falling down through the candle so that you do not collect the long whip upgrade. As you reach the ground jump up and activate the watch. The visual cue here is the fishman jumping up out of the water behind you. You want to activate the watch when you see the bottom of his feet right above the candle flame. There are two pixels that you have hit the set up correctly and you do not have to pause buffer to try and save the cave skip. | ||
| + | |||
| + | * Pixel 1 - note the fishman's feet are right on the flames | ||
| + | |||
| + | [[File:CaveSkip Pixel1.png|250px]] | ||
| + | |||
| + | * Pixel 2 - note there is a single pixel between the bottom of his feet and the top of the flames | ||
| + | |||
| + | [[File:CaveSkip Pixel2.png|250px]] | ||
| + | |||
| + | * If you have done that correctly when you activate the watch there will not be a bat in front of you. Jump over the pit and jump up the platforms. As you jump to the highest platform walk to about the midpoint of the platform and activate the watch as the bat swoops down and the fishman pops up. You will whip the fishman and the candle, collect the holy water and be able to walk and jump out over the bat to damage boost into the rock platforms that normally only the fishmen are able to access. | ||
| + | |||
| + | * Once you land on the first rock platform jump to second platform below that one. Then you can take a step and throw a holy water to hit the fishman that pops up to the fourth platform or you can jump whip the fishman (note video shows the jump whip). | ||
| + | |||
| + | * Jump up from the fourth to the fifth platform (the highest one in the ceiling platforms) jump from the fifth to the sixth and the sixth to the eighth skipping the seventh lower platform. Pause there and wait for the moving platform to move below you, drop down, Simon will clunk - you have to wait till he comes out of that animation to jump to the next moving platform otherwise your input will get eaten. After jumping up whip the next candle to get a big heart, then throw a water at the next candle to get the long whip upgrade. | ||
| + | |||
| + | * Jump from the moving platform to the next platform, as you jump from that platform to the next do a delayed water throw to hit the bat, then jump from the final platform to the ground. Jump up the elevated platforms to get to the stairs and exit the cave. | ||
| + | |||
| + | ==== Cave Skip Saves ==== | ||
| + | |||
| + | * If you mess up the watch activation and you see the fishman's feet not on the right pixels you can save the cave skip. | ||
| + | |||
| + | NOTE: will expand this section further | ||
| + | |||
| + | * Generally if you are early (the fishman is not above the candle fully) it is more difficult to save this but you pause buffer - I've (KCR experience results may vary lol) found that I pause and say to myself "crap" and sometimes I can save this, you'll only find out once you get to the top platform to do the second watch activation. | ||
| + | |||
| + | * If you're late on the first activation (fishman's feet are more than the 2 pixels above the candle flame) then I find its a much quicker pause buffer. | ||
| + | |||
| + | * All in all - the pause buffer is something that you have to get a feel for - you might as well attempt if you miss the set up. | ||
| + | |||
| + | <!--- Wolf outline will circle back on items we should add | ||
| + | |||
| + | === Cave Skip === | ||
| + | ==== Long Whip pickup ==== | ||
| + | <span style="color:#00FF00">Recommended to newcomers</span><br /> | ||
| + | (Video link) | ||
| + | ==== No Long Whip pickup (Faster, more difficult) ==== | ||
| + | (Video link)<br \> | ||
| + | '''It might be a good idea to have the two videos above show footage of different frames (so the long whip one showing frame 1 and the short whip one showing frame 2)''' | ||
| + | *Aim for 2-frame window, pause buffer if off, refer to backups section | ||
| + | *Explain top of screen movement | ||
| + | *Explain optimal jump off of moving platform | ||
| + | *If wanting to get long whip, grab big hearts for 8+ hearts, then grab long whip off last candle in stage | ||
| + | *If not, aim to exit the moving platform with less than 8 hearts so that the bat at the end may never drop the long whip | ||
| + | *If missed cave skip, refer to backups | ||
| + | |||
| + | === Cave Skip Setup on Additional Frames === | ||
| + | ==== Frames 3 & 4 ==== | ||
| + | (Video link) | ||
| + | *A little harder, but avoid a pause buffer | ||
| + | *Explain movements, show pictures of frames it works on | ||
| + | |||
| + | ==== Frames 5 & 6 ==== | ||
| + | (Video link) | ||
| + | *Same movements of frames 1 & 2, show pictures | ||
| + | |||
| + | ==== Frame 7 ==== | ||
| + | (Video link) | ||
| + | *Same movements of Frames 3 & 4, more lenient, show pictures | ||
| + | |||
| + | ==== Frames -1 and -2 ==== | ||
| + | (Video link) | ||
| + | *The chain jumps technically work on these two earlier frames as well, though it's not recommended as it's really tight, it's recommended to pause buffer instead. Document anyway, show pictures of working frames. | ||
| + | |||
| + | === Backups === | ||
| + | ==== Wrong Frame Pause Buffer ==== | ||
| + | (Video link) | ||
| + | ==== Long Whip Cave Skip ==== | ||
| + | (Video link) | ||
| + | *How to do the cave skip with the long whip | ||
| + | ==== Missed Cave Skip ==== | ||
| + | (Video Link) | ||
| + | |||
| + | --> | ||
| + | |||
| + | </div> | ||
| + | |||
| + | == <span class="mw-customtoggle-1" style="font-size:large; display:inline-block; float:right;"><span class="mw-customtoggletext">[Show/Hide]</span></span> Stage 11 == | ||
| + | <div id="mw-customcollapsible-1" class="mw-collapsible mw-collapsed"> | ||
| + | |||
| + | === Stage 11 Fleaman Alley === | ||
| + | |||
| + | * As you come up the stairs hold right, during stage 11 you can get consistent patterns but this requires not losing frames, so it is important to make sure you're heading right immediately. | ||
| + | |||
| + | * One super important note - you need to be aware of the item you are on in the item table. If you did not get a potion drop in level 3 (or in the cave) you are most likely lined up for the axe during stage 11. See the "short whip Strat" for getting the axe drop behind you or pay attention to jumping over the drops in the long whip section. | ||
| + | |||
| + | ==== Long Whip ==== | ||
| + | |||
| + | {{#ev:youtube|KLkhD_8a4Ow|550}} | ||
| + | |||
| + | * The overall pattern of stage 11 is: | ||
| + | |||
| + | * * single single double single double single double single single | ||
| + | |||
| + | single meaning a single bird with a fleaman and then a space | ||
| + | double meaning two birds with two fleamen closely appearing | ||
| + | |||
| + | * Easiest way to approach this is to jump and whip or jump and throw a holy water - your visual cues can be the background, I also like to have jumps to help me space the throws/whips correctly. Additionally, you want to practice the jumping so you can jump over any drops. | ||
| + | |||
| + | * First single jump and throw a holy water right before the middle of the this column. | ||
| + | |||
| + | [[File:Stage11_1.png|250px]] | ||
| + | |||
| + | * Second single jump and whip right before the start of this column. | ||
| + | |||
| + | [[File:Stage11_2.png|250px]] | ||
| + | |||
| + | * For the first double pair jump and throw a water then jump and whip. | ||
| + | |||
| + | [[File:Stage11_3.png|250px]] [[File:Stage11_4.png|250px]] | ||
| + | |||
| + | * Next single jump and whip here. | ||
| + | |||
| + | [[File:Stage11_5.png|250px]] | ||
| + | |||
| + | * Next double throw a delayed water and the jump and whip here. | ||
| + | |||
| + | [[File:Stage11_6.png|250px]] [[File:Stage11_7.png|250px]] | ||
| + | |||
| + | * Next single jump and whip here. | ||
| + | |||
| + | [[File:Stage11_8.png|250px]] | ||
| + | |||
| + | * Next double throw a water and then jump whip here. | ||
| + | |||
| + | [[File:Stage11_9.png|250px]] [[File:Stage11_10.png|250px]] | ||
| + | |||
| + | * Next single jump and whip here. | ||
| + | |||
| + | [[File:Stage11_11.png|250px]] | ||
| + | |||
| + | * Final single jump and throw a water here. | ||
| + | |||
| + | [[File:Stage11_12.png|250px]] | ||
| + | |||
| + | * For the bone dragon, if you have a heart leftover jump and throw a water at him - this will ensure you get a double shot from the next candle. | ||
| + | |||
| + | [[File:Stage11_13.png|250px]] | ||
| + | |||
| + | ==== Short Whip ==== | ||
| + | |||
| + | * While you will have to adjust a bit on the timing of the jump-whip in flea man alley, it is mostly the middle pair of flea man that are the issue. There are two main methods of dealing with that pair: | ||
| + | |||
| + | Here's Shockra Tease's Fleaman Alley with the short whip Strat - note the middle pair: | ||
| + | |||
| + | {{#ev:youtube|qrOCzeSB8OY|550}} | ||
| + | |||
| + | |||
| + | |||
| + | <!--- | ||
| + | |||
| + | === Long Whip Fleamen Alley === | ||
| + | <span style="color:#00FF00">Recommended to newcomers</span><br /> | ||
| + | (Video link) | ||
| + | *Explanation | ||
| + | *Fill this sction up with visual cues | ||
| + | |||
| + | === Short Whip Fleamen Alley === | ||
| + | (Video link) | ||
| + | *Explanation, get visual cues, blah blah | ||
| + | |||
| + | === 1-Heart Short Whip Fleaman Alley === | ||
| + | (Video link) | ||
| + | *Only 1 heart is used throughout this screen, plus the additional one on the bone dragon for the double shot. The goal is to preserve 2 hearts for frank so that the potentially lag-inducing big candle in stage 12 doesn't have to be broken. | ||
| + | *Also refer to this if you need to save up on hearts. If you have an excess, use more holy waters throughout this screen, refer to the section above.<br \> | ||
| + | '''Possibly show some alternate ways of hitting fleamen''' | ||
| + | ---> | ||
| + | </div> | ||
| + | |||
| + | == <span class="mw-customtoggle-2" style="font-size:large; display:inline-block; float:right;"><span class="mw-customtoggletext">[Show/Hide]</span></span> Stage 12 == | ||
| + | <div id="mw-customcollapsible-2" class="mw-collapsible mw-collapsed"> | ||
| + | |||
| + | === Simple === | ||
| + | |||
| + | {{#ev:youtube|3jkDnkg-h58|550}} | ||
| + | |||
| + | * Entering this room jump and whip the third candle, if you hit enough flea men/birds with the holy water (reminder hitting the bone dragon before the stage 12 door will ensure this) this candle will drop a double multiplier. | ||
| + | |||
| + | * After collecting the double, do a standing whip as the next bone dragon appears out of the blocks, and then jump over the head of the dragon. You should be able to jump immediately again and hurdle the dragon without taking a hit. Continue holding right and the second bone dragon you should be able to jump over its head and then immediately jump again in the middle of the dragon without taking a hit. | ||
| + | |||
| + | === Optimal === | ||
| + | |||
| + | * After collecting the double from the third candle you can do a quick pause buffer and this will put the bone dragon on the correct cycle to jump it. | ||
| + | |||
| + | {{#ev:youtube|8EWaTsJBWl8|550}} | ||
| + | |||
| + | * Alternatively, you can jump up and collect the double, while falling do another delayed whip that should put the bone dragon on the correct cycle. | ||
| + | |||
| + | {{#ev:youtube|SmpyBQ7RYqo|550}} | ||
| + | |||
| + | * For both of these options proceed to the right, jumping the second bone dragon and onto the boss fight. | ||
| + | |||
| + | |||
| + | |||
| + | <!--- | ||
| + | === Simple === | ||
| + | <span style="color:#00FF00">Recommended to newcomers</span><br /> | ||
| + | (Video link) | ||
| + | *Standing whip buffer for bone dragon | ||
| + | |||
| + | === Optimal === | ||
| + | (Video link) | ||
| + | *Show both ways in the video, the while falling whip and the pause buffer. Both are fine, it boils down to preference, although with the pause buffer you risk adding an extra tick on the IGT after the orb grab, in certain scenarios. | ||
| + | *Point out that the big candle should be skipped optimally as it can cause lag (show the heart being grabbed with the pause buffer clip, it being ignored and already having 2 hearts with the landing whip clip) | ||
| + | |||
| + | === Backups === | ||
| + | ==== Death Recovery ==== | ||
| + | (Video link) | ||
| + | *Smooth way of recovering from death and picking up the dagger | ||
| + | --> | ||
| + | </div> | ||
| + | |||
| + | == <span class="mw-customtoggle-3" style="font-size:large; display:inline-block; float:right;"><span class="mw-customtoggletext">[Show/Hide]</span></span> Igor and Frankenstein's Monster == | ||
| + | <div id="mw-customcollapsible-3" class="mw-collapsible mw-collapsed"> | ||
| + | === Simple === | ||
| + | |||
| + | * An easy Igor and Frankenstein's Monster fight as long as you have the holy water and the multiplier is to stand in the middle of the right platform and toss a holy water then whip three times. Repeat this pattern for a total of 3 holy water tosses. After you kill the boss, wait till the flames disappear, whip twice and you can jump from the platform and grab the orb. Review the orb grab section if you have questions on that. | ||
| + | |||
| + | {{#ev:youtube|PaMHE2p7p3o|550}} | ||
| + | |||
| + | === Simple Short Whip=== | ||
| + | |||
| + | * If you have short whip, instead of standing on the platform, fall off of the platform but be sure to not hold right after you start to fall. Once Simon's feet are on the ground throw a holy water then whip three times - repeat this for a total of three. | ||
| + | |||
| + | {{#ev:youtube|XSpHRWPkio0|550}} | ||
| + | |||
| + | === Frank Crits === | ||
| + | |||
| + | * For the crits you set up the same as you would with the short whip fight. Throw a water and whip twice, then throw the next water - after you throw the water you walk forward and whip four times. After the fourth whip you have to turn and walk away from the boss and whip once more. The distance you move away depends on how close you came to the boss. Below is the chart for that adjustment and the video guide: | ||
| + | |||
| + | [[File:Frank_Crit_Explanation.png|500px]] | ||
| + | |||
| + | |||
| + | <!--- | ||
| + | <span style="color:#00FF00">Recommended to newcomers</span><br /> | ||
| + | (Video link) | ||
| + | *Explanation, standard holy water fight | ||
| + | *Orb grab info, mimic level 1 info | ||
| + | |||
| + | === Crit === | ||
| + | (Video link) | ||
| + | *Explanation of setup, provide pictures with pixel information, video should show a few timings (or maybe there should be separate videos) | ||
| + | |||
| + | === Backups === | ||
| + | ==== Axe fight ==== | ||
| + | (Video link) | ||
| + | ==== Dagger fight ==== | ||
| + | (Video link) | ||
| + | ---> | ||
| + | </div> | ||
| + | |||
| + | == <span class="mw-customtoggle-4" style="font-size:large; display:inline-block; float:right;"><span class="mw-customtoggletext">[Show/Hide]</span></span> 2snek Beginner/Race Video Guide == | ||
| + | <div id="mw-customcollapsible-4" class="mw-collapsible mw-collapsed"> | ||
| + | |||
| + | {{#ev:youtube|7_sYEXJap4c|550}} | ||
| + | |||
| + | {{#ev:youtube|ZKv165Ct-To|550}} | ||
| + | |||
| + | {{#ev:youtube|YZKt1WEUYOM|550}} | ||
| + | |||
| + | </div> | ||
Latest revision as of 22:36, 11 August 2022
 | |
| Game | Castlevania |
|---|---|
| Level sections | Stage 10, Stage 11, Stage 12 |
| Level name | 4 |
| Previous level | Level 3 |
| Next level | Level 5 |
Contents
[Show/Hide] Stage 10
Stage 10
Beginner route
- If you want to hold off on learning cave skip, the cave is somewhat straight forward. Simon will land and clunk, holding right to keep moving to the right - jump from the first platform to the second. The candle above the second platform will have a watch, this is useful to get in the habit of grabbing the watch for the cave skip but also to make the level easier.
- Jump from the platform to the moving platform and watch for fishmen and bats. If you move consistently from the clunk, you should just beat the fishmen and bats on the moving platform if you keep moving the fishmen will jump up from below behind you and as you approach the gap in between the platforms a bat will appear from the right. This bat as long as you are not jumping should appear at Simon's level and is easy to jump in stride.
- Jump up to the next two platforms, once you get to the highest one, break the second candle for the holy water. Drop down to the low platform, wait for the moving platform and whip the first bat that appears. Jump out to the moving platform, if you may or may not have another bat appear mid-jump or a fishman jump out of the water - be prepared, the pattern should be consistent but can be slightly different based on frames lost.
- Crouch down so you don't get knocked off of the moving platform by the hanging rocks, and watch for a bat to spawn from the right whip it once you can. Then jump up to the small elevated platform. Wait for the next moving platform, whip any fishmen that pose a threat, get on the moving platform and duck under the next hanging rocks.
- The moving platform will move towards another moving platform, jump up to that platform, whip the first candle you come to for five hearts and then throw a holy water at the next candle to get the whip upgrade if you do not have it already. Then jump to the next platform, and the following platform. There is a super troll-y bat after this platform - you can jump and whip or throw a water at it of just wait till it passes over Simon.
- Jump from that platform to ground and then jump up the platforms to reach the stairs and exit the cave.
Cave Skip
- Once Simon lands, he will clunk. You need to wait for Simon to stand and then do 3 whips. The purpose of the whips is to lose 66 frames each whip is 22 frames. Whip while holding right, this will take some practice and while you can technically still make the moving platform by whipping once then taking a step, and doing this three times - it may be tough to catch the platform.
- Immediately after the third whip you want to jump and whip the candle in front of you to get the big heart, jump and whip to the next platform to pick up the watch and jump onto the moving platform. If you are having issues making this platform check that you are not spamming the whip button at the 3 whip pause buffer (this requires decent whip rhythm) or not trying to jump to the moving platform too early.
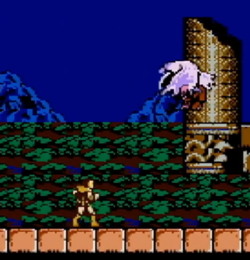
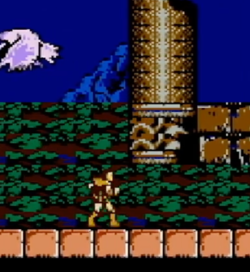
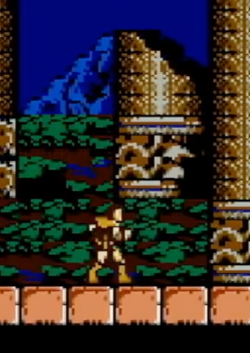
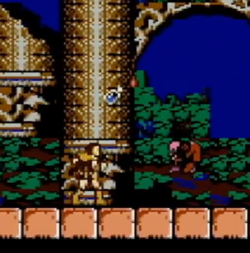
- Ride the moving platform, jump and whip the second candle to get another big heart, and jump to the next platform. Walk right and jump up and whip the second candle. You want to whip as you are falling down through the candle so that you do not collect the long whip upgrade. As you reach the ground jump up and activate the watch. The visual cue here is the fishman jumping up out of the water behind you. You want to activate the watch when you see the bottom of his feet right above the candle flame. There are two pixels that you have hit the set up correctly and you do not have to pause buffer to try and save the cave skip.
- Pixel 1 - note the fishman's feet are right on the flames
- Pixel 2 - note there is a single pixel between the bottom of his feet and the top of the flames
- If you have done that correctly when you activate the watch there will not be a bat in front of you. Jump over the pit and jump up the platforms. As you jump to the highest platform walk to about the midpoint of the platform and activate the watch as the bat swoops down and the fishman pops up. You will whip the fishman and the candle, collect the holy water and be able to walk and jump out over the bat to damage boost into the rock platforms that normally only the fishmen are able to access.
- Once you land on the first rock platform jump to second platform below that one. Then you can take a step and throw a holy water to hit the fishman that pops up to the fourth platform or you can jump whip the fishman (note video shows the jump whip).
- Jump up from the fourth to the fifth platform (the highest one in the ceiling platforms) jump from the fifth to the sixth and the sixth to the eighth skipping the seventh lower platform. Pause there and wait for the moving platform to move below you, drop down, Simon will clunk - you have to wait till he comes out of that animation to jump to the next moving platform otherwise your input will get eaten. After jumping up whip the next candle to get a big heart, then throw a water at the next candle to get the long whip upgrade.
- Jump from the moving platform to the next platform, as you jump from that platform to the next do a delayed water throw to hit the bat, then jump from the final platform to the ground. Jump up the elevated platforms to get to the stairs and exit the cave.
Cave Skip Saves
- If you mess up the watch activation and you see the fishman's feet not on the right pixels you can save the cave skip.
NOTE: will expand this section further
- Generally if you are early (the fishman is not above the candle fully) it is more difficult to save this but you pause buffer - I've (KCR experience results may vary lol) found that I pause and say to myself "crap" and sometimes I can save this, you'll only find out once you get to the top platform to do the second watch activation.
- If you're late on the first activation (fishman's feet are more than the 2 pixels above the candle flame) then I find its a much quicker pause buffer.
- All in all - the pause buffer is something that you have to get a feel for - you might as well attempt if you miss the set up.
[Show/Hide] Stage 11
Stage 11 Fleaman Alley
- As you come up the stairs hold right, during stage 11 you can get consistent patterns but this requires not losing frames, so it is important to make sure you're heading right immediately.
- One super important note - you need to be aware of the item you are on in the item table. If you did not get a potion drop in level 3 (or in the cave) you are most likely lined up for the axe during stage 11. See the "short whip Strat" for getting the axe drop behind you or pay attention to jumping over the drops in the long whip section.
Long Whip
- The overall pattern of stage 11 is:
- * single single double single double single double single single
single meaning a single bird with a fleaman and then a space double meaning two birds with two fleamen closely appearing
- Easiest way to approach this is to jump and whip or jump and throw a holy water - your visual cues can be the background, I also like to have jumps to help me space the throws/whips correctly. Additionally, you want to practice the jumping so you can jump over any drops.
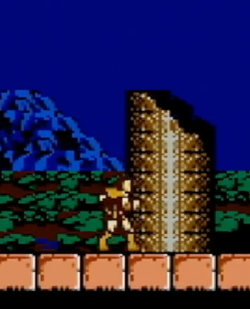
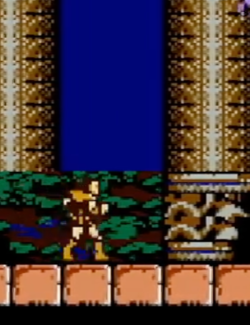
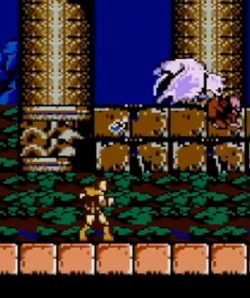
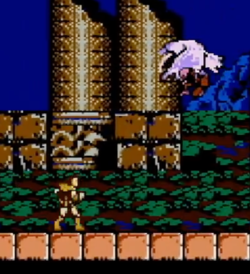
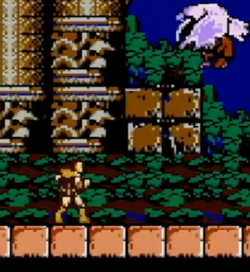
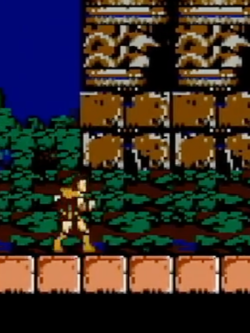
- First single jump and throw a holy water right before the middle of the this column.
- Second single jump and whip right before the start of this column.
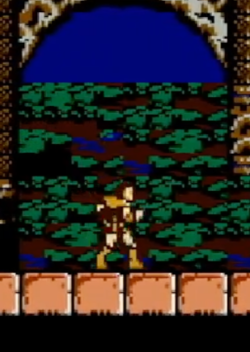
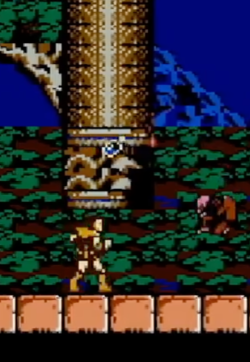
- For the first double pair jump and throw a water then jump and whip.
- Next single jump and whip here.
- Next double throw a delayed water and the jump and whip here.
- Next single jump and whip here.
- Next double throw a water and then jump whip here.
- Next single jump and whip here.
- Final single jump and throw a water here.
- For the bone dragon, if you have a heart leftover jump and throw a water at him - this will ensure you get a double shot from the next candle.
Short Whip
- While you will have to adjust a bit on the timing of the jump-whip in flea man alley, it is mostly the middle pair of flea man that are the issue. There are two main methods of dealing with that pair:
Here's Shockra Tease's Fleaman Alley with the short whip Strat - note the middle pair:
[Show/Hide] Stage 12
Simple
- Entering this room jump and whip the third candle, if you hit enough flea men/birds with the holy water (reminder hitting the bone dragon before the stage 12 door will ensure this) this candle will drop a double multiplier.
- After collecting the double, do a standing whip as the next bone dragon appears out of the blocks, and then jump over the head of the dragon. You should be able to jump immediately again and hurdle the dragon without taking a hit. Continue holding right and the second bone dragon you should be able to jump over its head and then immediately jump again in the middle of the dragon without taking a hit.
Optimal
- After collecting the double from the third candle you can do a quick pause buffer and this will put the bone dragon on the correct cycle to jump it.
- Alternatively, you can jump up and collect the double, while falling do another delayed whip that should put the bone dragon on the correct cycle.
- For both of these options proceed to the right, jumping the second bone dragon and onto the boss fight.
[Show/Hide] Igor and Frankenstein's Monster
Simple
- An easy Igor and Frankenstein's Monster fight as long as you have the holy water and the multiplier is to stand in the middle of the right platform and toss a holy water then whip three times. Repeat this pattern for a total of 3 holy water tosses. After you kill the boss, wait till the flames disappear, whip twice and you can jump from the platform and grab the orb. Review the orb grab section if you have questions on that.
Simple Short Whip
- If you have short whip, instead of standing on the platform, fall off of the platform but be sure to not hold right after you start to fall. Once Simon's feet are on the ground throw a holy water then whip three times - repeat this for a total of three.
Frank Crits
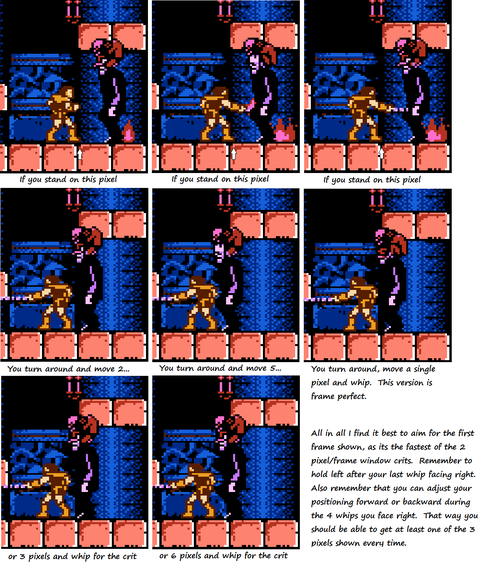
- For the crits you set up the same as you would with the short whip fight. Throw a water and whip twice, then throw the next water - after you throw the water you walk forward and whip four times. After the fourth whip you have to turn and walk away from the boss and whip once more. The distance you move away depends on how close you came to the boss. Below is the chart for that adjustment and the video guide:
