Difference between revisions of "Cv4/stageA"
From Castlevania Speedrunning
(→Boss: Akmodan II (Mummy)) |
Bogaabogaa (talk | contribs) |
||
| Line 12: | Line 12: | ||
== Optimal Route == | == Optimal Route == | ||
| − | |||
| − | |||
| − | |||
{{#ev:youtube|ZVXrX9bQFDA|560||}} | {{#ev:youtube|ZVXrX9bQFDA|560||}} | ||
'''Notes:''' | '''Notes:''' | ||
*0:32 - Dboost Skeleton is RNG | *0:32 - Dboost Skeleton is RNG | ||
| + | |||
| + | == Tutorials == | ||
=== Bad Gear Push Explained === | === Bad Gear Push Explained === | ||
{{#ev:youtube|vW_F6MbgUGk|560||}} | {{#ev:youtube|vW_F6MbgUGk|560||}} | ||
| Line 45: | Line 44: | ||
</div> | </div> | ||
</div> | </div> | ||
| + | |||
| + | == Strat Compare Time Saves == | ||
| + | ===First climb Stage A despawn Gear Nobs=== | ||
| + | {{#ev:youtube|egm-qaXMOJM|560||}} | ||
| + | Note: This reduces lag and saves almost a second. | ||
| + | |||
== Boss: Akmodan II (Mummy) == | == Boss: Akmodan II (Mummy) == | ||
Revision as of 21:26, 29 March 2021
 | |
| Game | Super Castlevania IV |
|---|---|
| Level sections | A-1, A-2 |
| Level name | Clock Tower |
| Previous level | Stage 9 |
| Next level | Stage B |
Contents
Safe Route
Need vid here.
Optimal Route
Notes:
- 0:32 - Dboost Skeleton is RNG
Tutorials
Bad Gear Push Explained
Note: For the trick, hold left for a couple of frames as Simon lands on the gear after the medusa boost.
Climb A early first ring grab
- A Rushed explanation what you need to know for a early first Ring grab in the second climb A
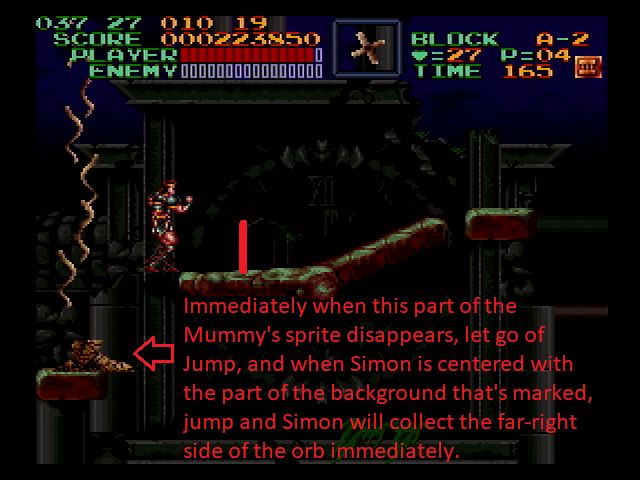
Stage A-1-3: Setup for 1st Ring Glitch (Ver. 1)
Stage A-1-3: Setup for 2nd Ring Glitch (Ver. 1)
Stage A-1-3: Setup for 2nd Ring Glitch (Ver. 2)
Strat Compare Time Saves
First climb Stage A despawn Gear Nobs
Note: This reduces lag and saves almost a second.
Boss: Akmodan II (Mummy)
Overview
- The biggest time loss/save comes from the Mummy whose spawns are random. The best outcome is a 1 cycle in which he would spawn from either the far left or far right of the screen.
- Each full cycle costs 1400 frames (~23.3 sec)
- Half a cycle or if you are one hit off is still a 700 (~11.6 sec) frame time loss. So it is worth to practice nailing the 1 cycle or any subsequent cycles to lessen the time loss.
1 Cycle Mummy Strats
Left Side
Right Side
Notes:
- For both of these videos, these are best scenarios. Mummy can give fireballs as an attack instead of bandage and positioning will have to change.
