Difference between revisions of "Cv1/dracula"
(Created page with "This article is a heavy WIP == <span class="mw-customtoggle-0" style="font-size:large; display:inline-block; float:right;"><span class="mw-customtoggletext">[Show/Hide]</sp...") |
m |
||
| Line 1: | Line 1: | ||
| + | {{Infobox level | ||
| + | | image = cv1level6.png | ||
| + | | game = Castlevania | ||
| + | | level_name = 6 | ||
| + | | level_sections = Dracula | ||
| + | | previous = [[cv1/level6 | Level 6]] | ||
| + | | next = None | ||
| + | }} | ||
| + | |||
This article is a heavy WIP | This article is a heavy WIP | ||
Revision as of 12:54, 7 May 2021
 | |
| Game | Castlevania |
|---|---|
| Level sections | Dracula |
| Level name | 6 |
| Previous level | Level 6 |
| Next level | None |
This article is a heavy WIP
[Show/Hide] Phase 1
Simple
Recommended to newcomers
(Video Link)
- 3-cycle attempt with 5-cycle backup
- Explain left-right switching, how spawns and fireball patterns work
2-Cycle: Descending Crit
(Video Link)
- Easier to learn
- Thoroughly explain movements and visual cues
- Optional whip buffer (not recommended)
- Frame perfect descending crit variant to keep it simple and let people focus on movement
- 3-Cycle backup (maybe put this section under backups?)
- Refer to backups if missed backward jump
- If fast pattern, either fall back on old school 3-cycle attempt, or refer to the Pause Buffer Section
2-Cycle: Ascending Crit
(Video Link)
- More difficult to learn, but more lenient
- Thoroughly explain movements and visual cues
- Optional whip buffer (not recommended)
- Explain Ascending Whip setup (aim for 2-frame stagger pixels)
- 3-Cycle backup (maybe put this section under backups?)
- Refer to backups if missed backward jump
- If fast pattern, either fall back on old school 3-cycle attempt, or refer to the Pause Buffer Section
Fast Pattern 2-Cycle: Pause Buffer
(Video Link)
- Give frame number
- Append this chart:
Pause Buffer Patterns
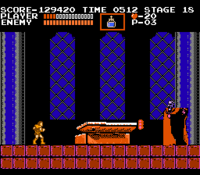
"x frames pause" means pressing start once, and repressing it to unpause x frames later. These spawns happen if Simon does the 2-cycle movement after a pause buffer on the fast pattern. -2 frames pause: normal 2-cycle spawn that we're used to, but attack speed seems RNG. -3 frames pause: Dracula spawns just left of the mid-left candle. -4 frames pause: Dracula spawns just right of the leftmost candle. -5 frames pause: Dracula spawns on top of Simon, hitting him. -6 frames pause: Dracula spawns on top of Simon, hitting him (same as 5 frames pause). -7 frames pause: Dracula spawns just right of the leftmost candle. -8 frames pause: Dracula spawns just right of the mid-left candle. -9 frames pause: Dracula spawns on the far right. Attack speed seems RNG. -10 frames pause: Normal 2-cycle spawn. Fixed attack speed. Aim for this one. -11 frames pause: Dracula spawns just left of the mid-left candle. -12 frames pause: Dracula spawns just right of the leftmost candle. -13 frames pause: Dracula spawns on top of Simon, hitting him. -14 frames pause: Dracula spawns on top of Simon, hitting him. (same as 13 frames pause). -15 frames pause: Dracula spawns just right of the leftmost candle. -16 frames pause: Dracula spawns just right of the mid-left candle. -17 frames pause: Dracula spawns on the far right. Attack speed might be fixed here. -18 frames pause: Normal 2-cycle spawn. Seems to continue on this pattern.
- Explain how to go about the fight if missed pause buffer
Hitless 3-Cycle
(Video Link)
- Explanation
Backups
Death Recovery
(Video Link)
Missed Backward Jump on 2-cycle Strat
(Video Link)
[Show/Hide] Phase 2
Standard After 3-Cycle
(Video Link)
- Manipulation info, let it jump once.
Standard After 4-Cycle or higher
(Video Link)
- Manipulation info, let it jump once.
Standard After 2-Cycle
Simple Opening
(Video Link)
- Easy 2-hit cross opening.
Intermediate Opening
(Video Link)
- 3-hit cross opening.
Optimal Opening
(Video Link)
- 4-hit cross opening.
Tyson Cookie
(Video Link)
- Showcase video after 2-Cycle Optimal Opening, but this can be done after any Phase 1 and after any opening.
- This is double frame perfect
- Visual cue if hit
- Only worth going for if consistent enough
- If going for this, needs fewer hearts, and can skip big heart at the end of Stage 17 if good pattern on 17-2 fleamen.
Backups
Double Shot Fight
(Video Link)
Single Shot Fight
(Video Link)
- When attacking, tap B for as little as possible to reduce the chances of the Cookie Monster jumping.