SOTN/Introduction to Speedrunning Alucard
If you are already proficient with speedrunning and/or are familiar with the mechanics of SOTN, feel free to skip to the page discussing the Standard Route instead.
Getting a Clear File
If you already have a Clear File, you can skip this section. If you have never played Symphony of the Night before, or do not yet have a Clear File or know what a Clear File is, read through this section to get an understanding of the process.
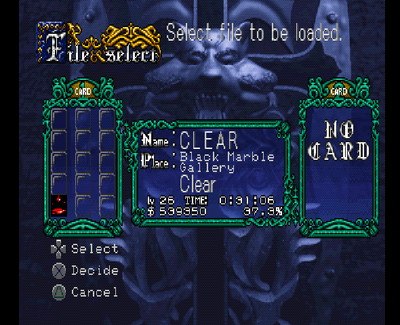
Symphony of the Night has a Save Feature and requires you to create a new Save File every time you start a new game. You obtain a Clear File by beating the game with the good ending, achieved by entering the Inverted Castle and defeating Dracula. Once you have a Clear File, you will want to keep it on your Memory Card, as having it allows you to skip dialogs and cutscenes when you start new games. Being able to do this saves roughly 8 minutes of time during the course of a run. This is vital to getting competitive times, so once you have obtained a Clear File, you should not delete it.
TODO: Mention an alternate way to get a Clear File by using Luck Mode
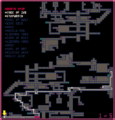
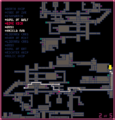
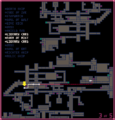
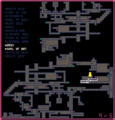
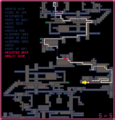
The easiest way to get a Clear File for someone new to speedrunning this game is to use a slightly-modified route from the standard Any% NSC route. Before you begin, you should familiarize yourself with one of these routes, (see the map slideshow below for one such example) and understand how to perform Death Skip, Richter Skip, and Relic Skip. Of these, the only skip that can't be practiced or learned efficiently during the run itself is Death Skip, as there are no Save Rooms prior to it and you only get one shot at it per run. Therefore, you should start out familiarizing yourself with the visual cues for Death Skip, in particular.
The rest of this section contains timestamps that refer to their corresponding points in the video above if you need or prefer a visual guide of what to do.
Once you are familiar with the major skips and the overall route, start up a run and work your way through the route. Throughout the run, you will encounter or be near to several Save Rooms and Life Vessels, so use them to your advantage if you are ever low on health or about to enter a tough section. Saving will also restore your MP, if you are ever low on it and passing by a Save Room.
(00:31) During the Prologue, as Richter, your goal is to gather at least 41 Hearts, then enter the throne room to trigger the fight with Dracula. If you grab 45 Hearts, you will have enough to use three Item Crashes with the Holy Water, which is enough to destroy Dracula in both his forms if you time them correctly.
(04:21) After the Prologue, as Alucard, your first goal is to execute the Neutron Bomb Death Skip. Next, grab the Cube of Zoe, defeat Slogra and Gaibon, and proceed to the Marble Gallery. From there, you will continue on to the fight with Doppelganger, and then activate the elevator in the Outer Wall and grab the Soul of Wolf Relic. Then, return to the Clock Room, and use the Wolf transform to jump off the candle and reach the left pathway once the statue on the left is no longer in the way. If the left statue is blocking the pathway, simply wait until the next clock cycle starts. Each clock cycle lasts one minute, and alternates with the pathway being open on even minutes and closed on odd minutes.
(15:38) Once you reach Olrox's Quarters, find the secret wall to the right of the Spectral Sword and break it open with your sword and enter the room. Inside that room, break open the middle vase to acquire an Onyx. Return to the room with the Spectral Sword, then proceed onto the Colosseum, and obtain the Shield Rod. The enemies in the Shield Rod room can be a tad difficult to deal with, so take your time making your way through them. If you know how to execute the Soul Steal spell, it can clear the room very easily.
(17:26) Once you have the Shield Rod, equip it over your Alucard Sword. You can now execute the Shield Rod spell, a special move that, when combined with the Alucard Shield, will give your shield an extremely powerful attack that also heals you and regenerate your hearts whenever you collide with an enemy while your shield is out. This move consumes MP when you cast it, as well as whenever you have your shield out, so use it only when you are about to collide with an enemy or boss. The use of this move makes every boss fight trivially easy to beat, making it ideal for your first run-through of the game. After activating this spell, proceed to the fight with the Werewolf and Minotaur, collecting the Library Card along the way, and use your shield to dispatch them quickly. Afterwards, collect the Form of Mist Relic and then use the Library Card, which will teleport you to the Long Library.
(19:25) Upon arriving in the Long Library, you will be just outside the Shop. Purchase a Library Card from the shop and leave, heading to the large stair section to the right. Perform a Wolf Stair Jump, (see video below) followed by a Mist Transform to make it onto the ledge with the Corpseweed on it. Use your shield to destroy the room full of Flea Men and Dullahans, as well as the Lesser Demon after that. Proceed onward to the grate that is blocking your path, breaking one of the vases to collect an Onyx along the way. Transform into Mist in order to pass through the grate, and collect the Soul of Bat Relic. Once you have the Soul of Bat Relic, use your Library Card.
(21:25) It is optional, but helpful, to return to the Shop and purchase a Manna Prism, as well as a few Potions. Once you are done with the Shop, head towards the Outer Wall to leave the Long Library, then take the elevator up and proceed to the Clock Tower area.
(23:19) Fly across the chasm leading towards the Clock Tower. This upcoming section has lots of Harpies and Medusa Heads in a relatively small area, which can prove difficult to deal with. Before entering this area, it is a good idea to have a Stopwatch and plenty of Hearts so that you can freeze everything in the room when needed and maneuver around them. The Shield Rod spell is also effective against the Sword Lords in the next section and will help you kill Karasuman very quickly. Once Karasuman is defeated, move on to the Castle Keep area.
(24:53) Once in the Castle Keep, it is a good idea to save in the nearby Save Room while you prepare to execute Richter Skip. This glitch can be very difficult to pull off at first, but you can retry indefinitely, and with the nearby Save Room, you can always return to your save file at this point to practice it until you get a feel for it. Once you have confirmation that the glitch worked (you will be able to freely move the camera up and down while in the hallway leading to the Throne Room, allowing you to see clouds up above when jumping), move on to the Throne Room to activate the cutscene with Richter. Due to the glitch, you will get the cutscene associated with saving Richter, and you will be permitted to move onto the Inverted Castle after the cutscene is finished.
(26:38) When you arrive in the Inverted Castle, proceed to the left and fly up until you reach the long hallway with Tombstones. These Tombstones can be tricky to deal with, but a safe strategy is to have the Shield Rod spell active, stop just before a Tombstone and wait for them to hop into you with your shield out. Make your way to the fight with Medusa and dispatch her quickly with your Shield. Continue onward to the portion of the Anti-Chapel filled with Imps and Snipers of Goth.
(28:57) This room of the Anti-Chapel is sometimes called the Imp Room, as it features numerous Imps and Snipers of Goth that can be particularly challenging to deal with. A reasonably safe strategy is to use your Stopwatch multiple times as you carefully fly your way upward and head toward Reverse Colosseum.
(30:09) The Minotaurs and Werewolves in the Reverse Colosseum deal a lot of damage, so it is important that you take care not to get hit. Make your way to the next section as safely as you can, and once you are there, you will immediately fly up and past an Azaghal (a ghost swordsman), then zig-zag upward in the next area until making it to the Black Marble Gallery. Once there, proceed to the right into the room with Giants, (if you stay high up near the ceiling, you can safely fly over the giants) and fly up above the room with a Gorgon and 3 Jack O' Bones.
(32:25) Now that you are in the room where you will perform the Relic Skip, take the opportunity to save in the room just to the left of here. Since this route does not involve getting the Duplicator, you will only have one Heart Refresh to use for the skip, so if you fail, you will want to reload from your last save to try again. If you are uncomfortable with Wing Smashes, when you are in the ceiling heading left after the skip, fly until you are just past the middle, bronze grandfather clock. Stop here, and do exactly one Wing Smash and then immediately hold up and left while tapping jump repeatedly. From that spot, the single Wing Smash should be enough to carry you to about the right spot. Do not stop tapping jump until you wind up in the other Save Room above the ceiling. From here, take the elevator upward into the area where you will fight Shaft and then Dracula.
(33:53) With the Shield Rod and Alucard Shield equipped, all you really need to do to defeat Shaft and Dracula is hold out your shield while repeatedly jumping into them. Shaft can be beaten in under a second with this method, and Dracula can be beaten in under 5 seconds. Once you have defeated Dracula, you should have a Clear File, and in all future runs you will be able to skip the cutscenes.
Completing Your First Full Run
Once you have a Clear File, your next goal should be to decide which category you will learn, and practice doing full runs. If you followed the tutorial for creating your own Clear file, then you may already have your first full run of Alucard Any% NSC completed. If you choose to continue with that category, you will find that skipping the cutscenes alone allows you to save 8 minutes from your time.
The only goal here is to be able to complete a full run without dying or getting lost and without having to reset.
Improving Your Runs
Your goal at this point is to begin incorporating more efficient techniques into your runs. It is NOT advisable to jump to immediately adding all of the top-level techniques all at once and try to execute those, as you will likely just wind up with a long stream of failed runs. Rather, at the start of each session of runs, have a technique that is new to you or that you are still mastering that you will focus on incorporating into your runs. It is best to prioritize adding those techniques that are easiest for you to learn and can deliver the largest time saves when executed. At the moment, there is no exhaustive list of techniques organized by their difficulty or time save potential, but the following improvements are easy enough to learn and can produce time saves of a minute or more when learned:
- Learn basic Shield Dashing (focus on slow and consistent)
- Tighten your jumps so that you are not floating in the air too much longer than is necessary to clear gaps
- Swap Shield Rod Route for Duplicator Route
- Learn Wing Smashing and, if possible, how to chain your Wing Smashes together during longer sections
The following techniques are neither easy to learn/master nor do they produce large enough time saves to be worthwhile for beginners, so avoid learning them too early and focus on other improvements first. Suggested personal best times have been listed as a recommendation before learning these techniques:
- Experience Route (17:59 or faster)
- Library Floor Clip (17:09 or faster)
TODO: Finish describing how to add new strategies to your runs as you improve
