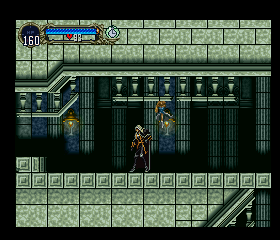
Difference between revisions of "SOTN/Alucard Any% NSC"
SestrenExsis (talk | contribs) (Update reference to Shop Glitch) |
SestrenExsis (talk | contribs) (Remove detail on Richter Skip) |
||
| Line 150: | Line 150: | ||
At the start of this section, you will transform into Bat and Wing Smash your way across the large chasm. This next section is filled with spawning Medusa heads and Harpies throwing knives at you, so precise movement is critical to avoid getting hit while you make your way to the section with the Sword Lords. Navigate between the broken stairs and make your way toward Karasuman. After killing Karasuman with Buffalo Stars, move left into the Castle Keep section. | At the start of this section, you will transform into Bat and Wing Smash your way across the large chasm. This next section is filled with spawning Medusa heads and Harpies throwing knives at you, so precise movement is critical to avoid getting hit while you make your way to the section with the Sword Lords. Navigate between the broken stairs and make your way toward Karasuman. After killing Karasuman with Buffalo Stars, move left into the Castle Keep section. | ||
| − | The Castle Keep section is the same section as from the Prologue with Richter, except now the staircase has fallen into ruin, leaving a gap you must fly over to enter the section where you will encounter the fight with Richter. During a normal playthrough of the game, you are expected to have the Holy Glasses at this point if you wish to be able to proceed to the Inverted Castle. In this category, however, the fastest routes all involve executing a glitch known as [[Richter Skip]] to avoid this check and proceed on to the Inverted Castle anyway. | + | The Castle Keep section is the same section as from the Prologue with Richter, except now the staircase has fallen into ruin, leaving a gap you must fly over to enter the section where you will encounter the fight with Richter. During a normal playthrough of the game, you are expected to have the Holy Glasses at this point if you wish to be able to proceed to the Inverted Castle. In this category, however, the fastest routes all involve executing a glitch known as [[Castlevania:_Symphony_of_the_Night:Glitches#Richter Skip|Richter Skip]] to avoid this check and proceed on to the Inverted Castle anyway. |
| − | |||
| − | |||
| − | |||
| − | |||
| − | |||
| − | |||
| − | |||
| − | |||
| − | |||
== Inverted Castle == | == Inverted Castle == | ||
Revision as of 11:35, 20 October 2021
Alucard Any% NSC (No Save Corruption) is the most popular speedrunning category for Symphony of the Night. It is well balanced and a good choice for first category to learn. There is only one route, but it contains some advanced and safer strategies runners can choose from.
Contents
Introduction to SOTN Alucard Any% NSC
If you are already proficient with speedrunning and/or are familiar with the mechanics of SOTN, feel free to skip to the Standard Route section below.
Getting a Clear File
If you already have a Clear File, you can skip this section. If you have never played Symphony of the Night before, or do not yet have a Clear File or know what a Clear File is, read through this section to get an understanding of the process.
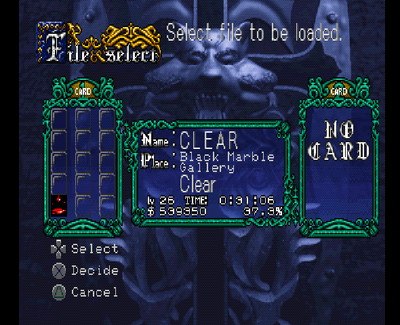
Symphony of the Night has a Save Feature and requires you to create a new Save File every time you start a new game. You obtain a Clear File by beating the game and keeping the Save File from that game on your Memory Card. Having a Clear File is important for speedrunning the game as it allows you to skip dialogs and cutscenes throughout the game, saving roughly 8 minutes of time during the course of a run. Once you have a Clear File, you should not delete it.
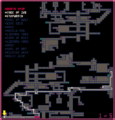
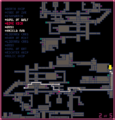
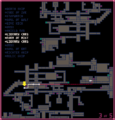
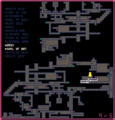
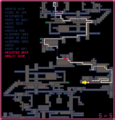
The easiest way to obtain a Clear File for someone new to speedrunning this game is to use a slightly-modified route from the standard Any% NSC route. Before you begin, you should familiarize yourself with one of these routes, (see the map slideshow below for one such example) and understand how to perform Death Skip, Richter Skip, and Relic Skip. Of these, the only skip that can't be practiced or learned efficiently during the run itself is Death Skip, as there are no Save Rooms prior to it and you only get one shot at it per run. Therefore, you should start out familiarizing yourself with the visual cues for Death Skip, in particular.
The rest of this section contains timestamps that refer to their corresponding points in the video above if you need or prefer a visual guide of what to do.
Once you are familiar with the major skips and the overall route, start up a run and work your way through the route. Throughout the run, you will encounter or be near to several Save Rooms and Life Vessels, so use them to your advantage if you are ever low on health or about to enter a tough section. Saving will also restore your MP, if you are ever low on it and passing by a Save Room.
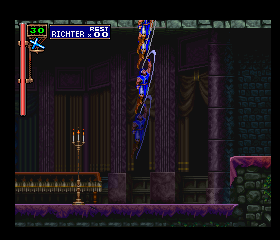
(00:31) During the Prologue, as Richter, your goal is to gather at least 41 Hearts, then enter the throne room to trigger the fight with Dracula. If you grab 45 Hearts, you will have enough to use three Item Crashes with the Holy Water, which is enough to destroy Dracula in both his forms combined with hitting him with your whip.
(04:21) After the Prologue, as Alucard, your first goal is to execute the Neutron Bomb Death Skip. Next, grab the Cube of Zoe, defeat Slogra and Gaibon, and proceed to the Marble Gallery. From there, you will continue on to the fight with Doppelganger, and then activate the elevator in the Outer Wall and grab the Soul of Wolf Relic. Then, return to the Clock Room, and use the Wolf transform to jump off the candle and reach the left pathway once the Statue is no longer in the way.
(15:38) Once you reach Olrox's Quarters, find the secret wall to the right of the Spectral Sword and break it open with your sword and enter the room. Inside that room, break open the middle vase to acquire an Onyx. Return to the room with the Spectral Sword, then proceed onto the Colosseum, and obtain the Shield Rod. The enemies in the Shield Rod room can be a tad difficult to deal with, so take your time making your way through them.
(17:26) Once you have the Shield Rod, equip it over your Alucard Sword. With both the Shield Rod and the Alucard Shield equipped, you can execute a special move by pressing both attack buttons at the same time that will give your shield an extremely powerful attack that also heals you and regenerate your hearts whenever you collide with an enemy while your shield is out. This move consumes MP when you cast it, as well as whenever you have your shield out, so use it only when you are about to collide with an enemy or boss. The use of this move makes every boss fight trivially easy to beat, making it ideal for your first run-through of the game. After activating this spell, proceed to the fight with the Werewolf and Minotaur, collecting the Library Card along the way, and use your shield to dispatch them quickly. Afterwards, collect the Form of Mist Relic and then use the Library Card, which will teleport you to the Long Library.
(19:25) Upon arriving in the Long Library, you will be just outside the Shop. Purchase a Library Card from the shop and leave, heading to the large stair section. Perform a Wolf Stair Jump followed by a Mist Transform to make it onto the ledge with the Corpseweed on it. Use your shield to destroy the room full of Flea Men and Dullahans, as well as the Lesser Demon after that. Proceed onward to the grate that is blocking your path, breaking one of the vases to collect an Onyx along the way. Transform into Mist in order to pass through the grate, and collect the Soul of Bat Relic. Once you have the Soul of Bat Relic, use your Library Card.
(21:25) It is optional, but helpful, to return to the Shop and purchase a Manna Prism, as well as a few Potions. Once you are done with the Shop, head towards the Outer Wall to leave the Long Library, then take the elevator up and proceed to the Clock Tower area.
(23:19) Fly across the chasm leading towards the Clock Tower. This upcoming section has lots of Harpies and Medusa Heads in a relatively small area, which can prove difficult to deal with. Before entering this area, it is a good idea to have a Stopwatch and plenty of Hearts so that you can freeze everything in the room when needed and maneuver around them. The Shield Rod spell is also effective against the Sword Lords in the next section and will help you kill Karasuman very quickly. Once Karasuman is defeated, move on to the Castle Keep area.
(24:53) Once in the Castle Keep, it is a good idea to save in the nearby Save Room while you prepare to execute Richter Skip. This glitch can be very difficult to pull off at first, but you can retry indefinitely, and with the nearby Save Room, you can always return to your save file at this point to practice it until you get a feel for it. Once you have confirmation that the glitch worked (you will be able to freely move the camera up and down while in the hallway leading to the Throne Room, allowing you to see clouds up above when jumping), move on to the Throne Room to activate the cutscene with Richter. Due to the glitch, you will get the cutscene associated with saving Richter, and you will be permitted to move onto the Inverted Castle after the cutscene is finished.
(26:38) When you arrive in the Inverted Castle, proceed to the left and fly up until you reach the long hallway with Tombstones. These Tombstones can be tricky to deal with, but a safe strategy is to have the Shield Rod spell active, stop just before a Tombstone and wait for them to hop into you with your shield out. Make your way to the fight with Medusa and dispatch her quickly with your Shield. Continue onward to the portion of the Anti-Chapel filled with Imps and Snipers of Goth.
(28:57) This room of the Anti-Chapel is sometimes called the Imp Room, as it features numerous Imps and Snipers of Goth that can be particularly challenging to deal with. A reasonably safe strategy is to use your Stopwatch multiple times as you carefully fly your way upward and head toward Reverse Colosseum.
(30:09) The Minotaurs and Werewolves in the Reverse Colosseum deal a lot of damage, so it is important that you take care not to get hit. Make your way to the next section as safely as you can, and once you are there, you will immediately fly up and past an Azaghal (a ghost swordsman), then zig-zag upward in the next area until making it to the Black Marble Gallery. Once there, proceed to the right into the room with Giants, (if you stay high up near the ceiling, you can safely fly over the giants) and fly up above the room with a Gorgon and 3 Jack O' Bones.
(32:25) Now that you are in the room where you will perform the Relic Skip, take the opportunity to save in the room just to the left of here. Since this route does not involve getting the Duplicator, you will only have one Heart Refresh to use for the skip, so if you fail, you will want to reload from your last save to try again. If you are uncomfortable with Wing Smashes, when you are in the ceiling heading left after the skip, fly until you are just past the middle, bronze grandfather clock. Stop here, and do exactly one Wing Smash and then immediately hold up and left while tapping jump repeatedly. From that spot, the single Wing Smash should be enough to carry you to about the right spot. Do not stop tapping jump until you wind up in the other Save Room above the ceiling. From here, take the elevator upward into the area where you will fight Shaft and then Dracula.
(33:53) With the Shield Rod and Alucard Shield equipped, all you really need to do to defeat Shaft and Dracula is hold out your shield while repeatedly jumping into them. Shaft can be beaten in under a second with this method, and Dracula can be beaten in under 5 seconds. Once you have defeated Dracula, you should have a Clear File, and in all future runs you will be able to skip the cutscenes.
Completing Your First Full Run
Once you have a Clear File, your next goal should be to practice doing full runs. Skipping the cutscenes allows you to save 8 minutes from your Clear File run alone.
The only goal here is to be able to complete a full run without dying or getting lost and without having to reset.
Improving Your Runs
TODO: Describe adding new strategies to your runs as you improve
Standard Route
The standard route requires knowledge of how to perform the following glitches: Death Skip, Faerie Card Shop Glitch, Richter Skip, and Relic Skip. You collect the following Relics, listed in order: Cube of Zoe, Form of Wolf, Form of Mist, Faerie Card, and Soul of Bat.
Prologue
Goals for the Prologue Section
- Gather enough Hearts to have 41 Hearts before entering Dracula's throne room
- End the Prologue fight while holding the Holy Cross item (optional)
- End the Prologue fight with 0 Hearts
In the Prologue, you play as Richter. Your performance in this section affects your starting equipment and stats during the main game when you play as Alucard. Your primary goal in the Prologue is to beat Dracula while meeting the conditions necessary to give Alucard two items in his inventory at the start of the main game, the Neutron Bomb and the Heart Refresh:
- To acquire the Neutron Bomb for Alucard, Richter must have 41 or more Hearts BEFORE the wine glass cutscene that triggers the fight with Dracula. Note that accessing the secret treasure room at the top of the stairs is required to be able to get this many Hearts.
- To acquire the Heart Refresh for Alucard, Richter must have 0 Hearts remaining by the time the photo burn cutscene begins after the fight with Dracula.
Richter begins the Prologue at the bottom of stairs that lead to an entrance room and Dracula's throne room.
At the top of the stairs, hidden in the ceiling, is a secret treasure room. The fastest way to gain access to it is to use Richter's uppercut move (Down, Up + Jump) while roughly halfway between the chandelier and the ledge. If you are in the correct position, Richter will pass through the ceiling and you will gain access to the secret treasure room without needing to lower the hidden staircase. If you are not in the correct position, you will collide with the ceiling instead. There is a candlestick containing 5 Hearts on the right side of the hidden room that you will want to collect before dropping back down into the entrance room.
Once you are back in the entrance room, collect 6 more Hearts from a candlestick and the vase. Along with the 30 Hearts Richter starts the Prologue with, you should now be at 41 Hearts.
Move to the left to enter the throne room and trigger the fight with Dracula (having 41 Hearts at this point fulfills the condition for acquiring the Neutron Bomb for Alucard). During this fight, Dracula has two forms. In his first form, he will teleport and throw projectiles. The easiest way to defeat Dracula's first form is to get the Holy Water sub-weapon from the leftmost candlestick in the throne room and use your Item Crash (Triangle or Y) with the Holy Water to cast Hydro Storm.
After defeating Dracula's first form, he will transform into a large monster. In his second form, he jumps around while throwing projectiles. The easiest way to defeat him in this form is to use your Item Crash again while whipping him and throwing Holy Waters. Remember to use up all your Hearts during this fight so that you end the fight with no Hearts remaining to fulfill the condition for acquiring Heart Refresh for Alucard.
Clock Rush
Goals for the Clock Rush Section
- Perform Death Skip to keep your starting equipment
- Obtain the Cube of Zoe Relic
- Pick up a Stopwatch sub-weapon
- Obtain the Form of Wolf Relic
- Pick up a Garnet
- Enter the Left Statue Path in Clock Room
From the moment you gain control of Richter in the Prologue, the game has an internal timer used to determine whether or not the statue in the upper-left corner of the Clock Room is blocking your path. On odd minutes (say, 7:00 through 7:59 or 9:00 through 9:59), the statue will be blocking your path. On even minutes (say, 8:00 through 8:59 or 10:00 through 10:59), the statue will be out of the way and the path will be open. This internal timer is not the same as your real-time timer used during a speedrun, as time spent in menus or looking at the map does not count towards the internal timer. However, if you spend little time looking at your map or in the menu, they will be close.
After the Prologue, and for the remainder of the game, you play as Alucard. A few rooms into the run, you will come across a section where the game tries to force you into a cutscene with the Grim Reaper (also known as Death), who steals your starting equipment. If you execute the Death Skip glitch, however, you can bypass this cutscene and keep all of your starting equipment, which is some of the strongest equipment in the game.
During the Clock Rush section, the goal is to make your way to the Outer Wall and obtain the Form of Wolf Relic from the elevator shaft, use a wolf stair jump to reach a vase on a high-up ledge and break it to get a Garnet, and return to the Clock Room while the path is open. If you reach the Clock Room while the path is closed, you will be forced to wait until the statue moves out of the way to progress. For example, if you arrive at the Clock Room when the internal timer is at 7:50, you will have to wait 10 more seconds before the path opens up.
Once you have the Form of Wolf Relic and Garnet and are in the Clock Room with the path open, you can jump above the left candle, transform into Wolf in mid-air and untransform immediately while still above the candle. Doing this enables Alucard to then perform a dive-kick by holding Down and pressing Jump while still in the air. The goal is to bounce off of the candle, which will give you enough height to reach the open path.
Clock Room Dive-Kick Tutorial by Dr4gonBlitz
From there, you proceed left to Olrox's Quarters, then past the Skelerangs and the Spectral Sword enemy and continue left to the Colosseum.
Colosseum
Goals for the Colosseum Section
- Pick up a Library Card
- Obtain the Form of Mist Relic
- Teleport to the Library
From the start of this section, proceed left until you reach a stairwell in front of a metal gate. Beyond this gate, you can see the Form of Mist Relic, but you cannot reach it yet. To do so, you will have to continue on to the arena (picking up the Library Card along the way) and defeat the Werewolf and Minotaur boss. This fight can be made much easier by skipping past the cutscene with Richter as quickly as possible. Doing this allows Alucard to start the fight early and get free hits in on the Werewolf and Minotaur. If done quickly enough, it is possible to kill both of them before either of them begin their attack sequences.
After the fight, a doorway will open up to the right, allowing you to proceed to the room where the Form of Mist Relic is located. Once you collect the Form of Mist Relic, equip your Library card and activate it to teleport to the Library.
Library
Goals for the Library Section
- Obtain the Faerie Card Relic
- Purchase a Manna Prism
- Purchase 2 Buffalo Stars
- Purchase a Library Card (optional if you are attempting the Wolf Floor Clip)
- Purchase the Duplicator
- Obtain the Soul of Bat Relic
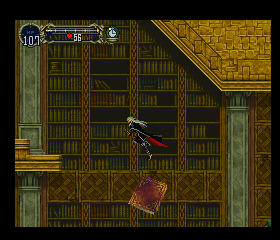
Upon entering the library, it is important not to enter the shop right away. Assuming you teleported in, the shop will be the room directly to your left. Instead, transform into Wolf and travel to the right until you reach a room with a large staircase and Book enemies flying about. Execute a Book Jump to reach a higher ledge to the upper left of this room that leads to a room containing the Faerie Card Relic. Do not enable the Relic right away.
Now, head back to just outside the Shop and execute the Faerie Card Shop Glitch. This glitch will duplicate your Garnet, giving you 255 of them. Sell at least 102 of them (which will show as E3 in the Sell Gem menu), and use this extra Gold to purchase 1 Manna Prism, 2 Buffalo Stars, and the Duplicator. You may also wish to purchase a Library Card unless you are going to attempt the Library Floor Clip in the upcoming section. Don't forget to equip the Duplicator, Manna Prism, and Buffalo Star as you get ready to leave the Shop. With the Duplicator, you can now use consumable items an infinite number of times.
Leave the shop, heading to the right back to the stairwell with Books. Execute a wolf jump on the stairs to take the lower of the two paths on high-up ledges above the stairwell. This path will lead you to a fight with Lesser Demon and, eventually, the Soul of Bat Relic, which is behind a Gate that you must use Form of Mist to get through.
Once you have the Soul of Bat, leave the Library as quickly as possible and make your way to the Outer Wall. The easier method is to teleport back near the shop using a Library Card, then proceed to Wing Smash your way to the Outer Wall. The much more difficult method is to execute the Wolf Floor Clip. Whichever method you execute, once you find yourself at the Outer Wall, take the elevator to the top, then continue upward until you reach the entrance to the Clock Tower.
Clock Tower & Richter Skip
At the start of this section, you will transform into Bat and Wing Smash your way across the large chasm. This next section is filled with spawning Medusa heads and Harpies throwing knives at you, so precise movement is critical to avoid getting hit while you make your way to the section with the Sword Lords. Navigate between the broken stairs and make your way toward Karasuman. After killing Karasuman with Buffalo Stars, move left into the Castle Keep section.
The Castle Keep section is the same section as from the Prologue with Richter, except now the staircase has fallen into ruin, leaving a gap you must fly over to enter the section where you will encounter the fight with Richter. During a normal playthrough of the game, you are expected to have the Holy Glasses at this point if you wish to be able to proceed to the Inverted Castle. In this category, however, the fastest routes all involve executing a glitch known as Richter Skip to avoid this check and proceed on to the Inverted Castle anyway.
Inverted Castle
After you teleport into the Inverted Castle, transform into Bat. Almost the entirety of this section will be spent in Bat form and involves chaining Wing Smashes together in long hallways and precise bat movement around and through enemies as you make your way through the Route. Along the way, you will encounter a fight with Medusa. Medusa is one of the bosses that drops a Relic that would ordinarily be required to complete the game, but since we will be performing the Relic Skip in the upcoming section, there is no need to collect it.
After the fight with Medusa, make your way to the vertical section with Imp and Sniper of Goth enemies flying around. With precise Wing Smash movement, you can make your way through this section unscathed as you ascend and head toward the Reverse Colosseum.
Enemies in the Reverse Colosseum and the remainder of this run are very powerful compared to your level and are capable of killing you in only 2 or 3 hits, so it is critical that you avoid getting hit in these sections.
After you leave the Reverse Colosseum, you will be in the Black Marble Gallery section where you will set up the Relic Skip.
Relic Skip & Final Battle
Once in the Black Marble Gallery, make your way to the Clock Room, then proceed right past the Giant enemies and upward to a ledge that is just to the right of a Save Room. This ledge is where you will perform the Relic Skip glitch.
Heart Refresh Relic Skip
- Set your sub-pixel to the correct value
- While in bat form, move against the ledge briefly (this will set Alucard's sub-pixel to the correct value)
- Fly up enough that you can do a canceled Wing Smash and land roughly near the position you need to setup the glitch
- Equip Heart Refresh
- Move into the correct position on the ledge and face to the left
- Execute a Reverse Shift Line
- Walk to the right immediately followed by activating the Heart Refresh (at this point you should be able to visually confirm whether or not your positioning was correct)
- While the Heart Refresh animation is playing, hold down the Dash button and don't let go until Alucard Dashes after the Heart Refresh animation finishes
- Walk briefly against the ledge just before the doorway to the Save Room
- Jump onto the ledge and walk to the left into the Save Room
- Travel along the ceiling
- As soon as the second Black Screen appears, hold down the Bat Transform button (if you don't see the flicker of a second Black Screen, return to the previous room and start the trick again)
- Let go of the Bat Transform button once you are repositioned into the ceiling of the room below the Save Room
- Perform six consecutive chained Wing Smashes while flying in the ceiling to the left
- As the sixth Wing Smash finishes and Alucard untransforms, hold Up and to the Left while mashing the Jump button (if at any point you are forced out of the ceiling, you will have to return to the room again and start all over)
- Keep mashing the Jump button until the flickering stops and you are forced into the other Save Room just outside of the lift that leads to Dracula's chambers
Heart Refresh Relic Skip Tutorial by Turbodog702
Once you have successfully executed the Relic Skip, equip Buffalo Stars in both your hand slots and take the lift up into Dracula's chambers. After exiting the lift, fly up and around the barriers and drop into Dracula's chambers to begin the fight with Shaft. Position yourself along the left wall and alternate using both Buffalo Stars while jumping to finish Shaft as quickly as possible.
Once Shaft is defeated, the cutscene and final fight with Dracula will begin. Stay in the middle of the room as Dracula descends, and focus alternating Buffalo Star attacks at his right hand. Dracula will attempt to swipe at you with either his left hand or his right hand, depending on which one you are closer to. Once you see his body shift in position to prepare the attack, move to the opposite side from that attack just enough to clear it. Do this a few times while spamming Buffalo Star attacks at his right hand, and you should be able to kill Dracula before his next phase begins.
Advanced Topics and Strategies
Experience Route
- 3 zombies
- all 3 skeletons in the first room of alchemy lab
- one green axe lord in the spittlebone room
Slogra and Gaibon Double Kill
- all 3 flea men
- everything in the long hallway
- one blue axe knight
- fast route with sub 8 clock rush
- kill everything in the outer wall
- kill sword lord once
- everything in the long hallway
- playstation / emulator route
- skip blue axe knight and spear guard
- everything in the long hallway
- kill first blade master
- everything in the long hallway
No Double Kill
- all 3 flea men
- fast route with sub 8 clock rush
- everything in the long hallway
- kill both blue axe knights
- kill everything in the outer wall
- kill sword lord once
- everything in the long hallway
- playstation / emulator route
- skip dipplos before dopple
- skip both blue axe knights
- skip blue axe knight and spear guard
- kill all 3 bone muskets
- everything in the long hallway
- kill first blade master
- everything in the long hallway
Record Progression
SOTN Record Progression#Alucard Any% No Save Corruption
