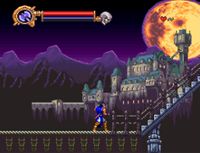
Dracx/stage7
 | |
| Game | Castlevania: Dracula X |
|---|---|
| Previous level | Stage 6 |
Safe
Notes:
- At 0:14, hold right and jump once, then let yourself get damage boosted through the pillars.
- At 0:26, drop down, then jump off and whip just before taking damage. If done correctly, you'll boost through the skeleton werewolf.
- If you're too quick on this (or too slow), it won't work.
- On the vertical climb at 0:33, mind the timing of the first jump. This will manipulate the next platforms' positions.
- Crouch so that if the spear knights hit you, you won't fall off.
- Grab as many hearts as possible, then enter Dracula's room.
Optimal
Notes:
- At 0:19, backflip over the final bone pillar (somewhat precise).
- At 0:29, boost off of the spear knight to skip a platform cycle.
- You want to backflip at the very peak of the bottom platform's ascent. At its highest position (stays there for 6 frames), the backflip can have a 10 frames or 11 frames delay on the B press (which is a max height or the frame before that). Any later than that 6 frame window requires a max height backflip.
- If you miss the spear knight, that usually means your backflip wasn't high enough.
- If you hit the spear knight but don't make it onto the moving platform on the right, that means you initiated your backflip too early.
- If you make it onto the moving platform on the right but can't seem to make it on the upper platform from there, that could mean you backflipped too late.
- Sometimes the spear knight decides to go left instead of right, which prevents the boost from happening. If that happens, fall back on the Safe strats for the first three platforms and then hop off to the left
- At 0:36, do the final skip of the run:
- Perform three jumps as soon as you enter the room with the axe knight, and make sure you're moonwalking to face right. You want to spawn the medusa head on the right and at a higher y coordinate.
- Wait in front of the 3rd candle from the right until the medusa head is visible on screen, then walk right a bit and backflip into it to boost onto the moving platform.
- Move onto the left side of the moving platform, and at the right time jump left to boost off the axe, and past the knight.
- If you jump from farther right, the axe knight will follow you while you try to walk left into the screen transition. Sometimes you'll get boosted left from him and be fine, but it does mean a more dangerous Dracula fight.
Boss
Notes:
- Stand on the right edge of the fourth pillar from the right, then prepare to react.
- Dracula in phase 1 has 8 different possible spawns, which are all based on complete luck. You have to learn how to respond to each of the 8, below there's a showcase of what to do for every spawn.
- Hack down phase 2 with axes as much as possible. They will also help take care of the fireballs, although if you finished phase 1 with certain spawns you'll need to stand as close as possible to the edge of the pillar you're standing on to properly destroy them, which comes at the downside of the actual timing for the axes to destroy the fireballs being tighter.
- Crouch cancel the knockback from the lightning attack if needed.
- Use and item crash to collect the orb at the end.
- If you're crazy for frames, you can also backflip from one of the higher pillars to grab the orb which is a little bit faster (use 3 jumps and 1 whip to set it up like for the stage 2 orb). If you miss the orb, you die.
Spawns guide
- If by the time Dracula should've spawned he still hasn't appeared on screen yet, that means he spawned on one of the 3 off-screen pillars. Walk left a bit, jump off, and throw an axe on landing in hopes that it's a hittable spawn. If it is, keep throwing axes for as long as you can hit Dracula.
- Dracula needs to be hit with 16 axes to end phase 1.
- The first 6 spawns allow for Dracula to be hit 3 times, spawn #7 allows for 2 hits, and spawn #8 can't be hit at all.
- The 5th cycle is always an energy spheres cycle, which is a little bit shorter. This makes it so that only spawns #2, #4 and #6 can be hit 3 times. Spawns #1, #3 and #5 can be hit 2 times, spawn #7 can only be hit 1 time, and spawn #8 still cannot be hit at all.
- After the 5th cycle, every 4 cycles there will be an energy spheres cycle (so that'd be the 9th cycle, the 13th cycle, the 17th cycle etc.)
- The best fight is a 6-cycle. All in all, the chance for a pattern that allows for a 6-cycle is ~50%.