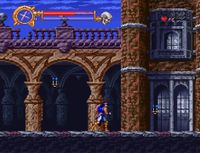
Dracx/stage2
From Castlevania Speedrunning
 | |
| Game | Castlevania: Dracula X |
|---|---|
| Previous level | Stage 1 |
| Next level | Stage 3 |
Contents
Safe
Notes:
- For the bridge at 0:17, jump two times, then use a cross on landing to take care of the mermen. Not necessary for the last merman.
- Bat spawns on screen2 are on a sort of proximity timer. By slowing down in certain spots, they could spawn in different positions.
- For the knight skip at 0:58, jump onto the stairs from somewhere near the base and wait on the step you land on for a little while, then jump up on the ledge and boost over the knight.
- For the spear boost at 1:05, check the tutorial below:
Spear Boost Tutorial
Optimal
Notes:
- You don't actually need to use crosses for the mermen on the bridge, but whipping them requires more precise timings.
- Landing as far right as possible before the bridge-opening cutscene saves time. The boost on the merman is taken to help with positioning and to optimize the results screen.
- When you land on the ledge that triggers the cutscene, you can still input an action for one frame. If you land on the farthest pixel to the right and you're holding right on the dpad, you will fall off and softlock! Be careful to avoid this scenario.
- At 0:38, delay your jumps a tiny amount to make the bat spawn a bit lower so that he can be hit with the same cross that takes down the barrel.
- At 0:56, try to land farther left on the stairs. This provides a different pattern on the axe knight which allows for a faster boost.
- The skeleton dog at the end deals less damage than the skeleton werewolf, so it's preferred to boost off of it in order to be able to do a faster boss strat which requires extra health.
Crunan Boost
- This is a faster way to boost off of the spear knight.
- Stand just left of the background purple pillar while whipping the skeleton dog, then move right a bit, late in the knight's whirl.
- This is because the knight has two patterns, one where he walks left once, one where he walks right once. Moving right a bit makes it so that he can't hit you preemptively.
Boss
Safe
- This kills the boss in 2 cycles.
- Stand towards the center of the middle platform during the first cycle.
- Make sure the first cross at the start of 1st cycle is earlier rather than later. Ideally you want to hit the boss as soon as it becomes vulnerable so it doesn't move an inch, otherwise you could get different patterns.
- This is also a damageless way to fight the boss, though sometimes you will get hit right before the second item crash.
Optimal
- This strat shortens the cycles and provides a faster fight, but it comes at the cost of two damage boosts.
- Stand on the left side of the middle platform during the first cycle.
- Make sure the first crosses both at the start of 1st cycle and at the start of 2nd cycle are earlier rather than later. Ideally you want to hit the boss as soon as it becomes vulnerable so it doesn't move an inch, otherwise you could get different patterns.
- The 4th whip at 0:06 is just to make it so that Richter takes knockback, uncrouching works the same.
- Delay the final item crash a small amount to make sure you don't take an extra hit when it finishes.
- If you don't have enough health for this strat, follow the Safe strats instead.
- 3 jumps and 1 whip, initiated as soon as the orb spawns, makes a solid buffer for a more optimal orb grab from the middle ledge.