Cv4/tutorials
Contents
Just_Defend's Tutorials
CV4 Beginner's Tutorial for Speedruns: Part 1
CV4 Beginner's Tutorial for Speedruns: Part 2
CV4 Beginner's Tutorial for Speedruns: Part 3
CV4 Tutorial Advanced Tips + Tricks
JoeDamillio's (Most) Bosses Tutorial
Picture Tutorials by JoeDamillio
Notes:
Notes:
Notes: Jay_Cee's Armadillo Kill
Notes: Whip down at the Mudmen a later than usual. This will ensure that even with the worst pattern (where the Mudmen hugs the corner), Simon will not take damage.
Notes:
Notes:
Notes:
Notes:
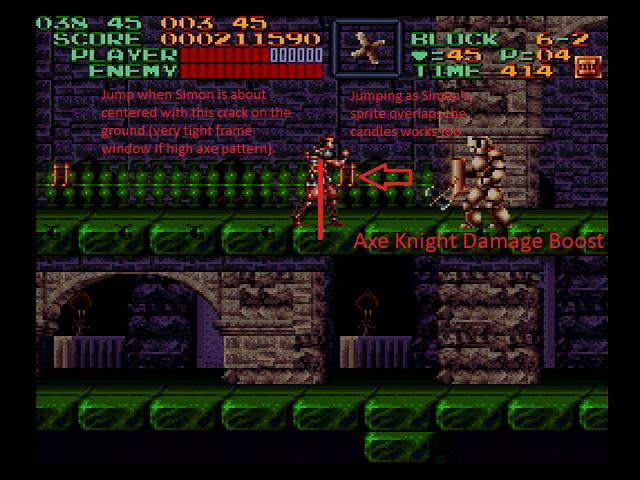
Notes: Jump when Simon's sprite is centered with the circle design on the platform (marked in purple). There are many different ways to do this damage boost.
Notes:
Notes:
Notes:
Notes:
Notes: This is an image of the left-most pixel Simon can stand on this platform. This is required for the early orb grab (which is a 50/50 chance due to collision detection only detecting every other frame).
Notes:
Notes: These are the 4 pixels where Simon can jump into the screen transition [NOTE: Only relevant when performing the wall clip.]
