Difference between revisions of "Cv4/tutorials"
Bogaabogaa (talk | contribs) (→JoeDamillio Cues and Picutre Tutorial) |
JoeDamillio (talk | contribs) |
||
| Line 1: | Line 1: | ||
| − | == | + | == Just_Defend's Tutorials == |
=== CV4 Beginner's Tutorial for Speedruns: Part 1 === | === CV4 Beginner's Tutorial for Speedruns: Part 1 === | ||
| Line 14: | Line 14: | ||
{{#ev:youtube|4Gh0LrS6pfM|560||This is intended for more experienced players - going over a few riskier boss strategies and time saving tricks}} | {{#ev:youtube|4Gh0LrS6pfM|560||This is intended for more experienced players - going over a few riskier boss strategies and time saving tricks}} | ||
| − | == JoeDamillio | + | == JoeDamillio's (Most) Bosses Tutorial == |
{{#evt: service=twitchvod|id=309900115|dimensions=560|urlargs=autoplay=false}} | {{#evt: service=twitchvod|id=309900115|dimensions=560|urlargs=autoplay=false}} | ||
| − | == JoeDamillio | + | == Picture Tutorials by JoeDamillio == |
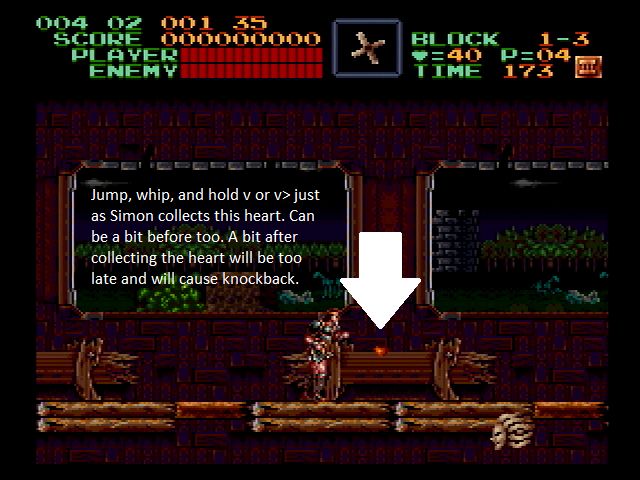
| − | [[File: | + | [[File:Stage 1 1st Medusa Head Boost.jpg]] |
Notes: | Notes: | ||
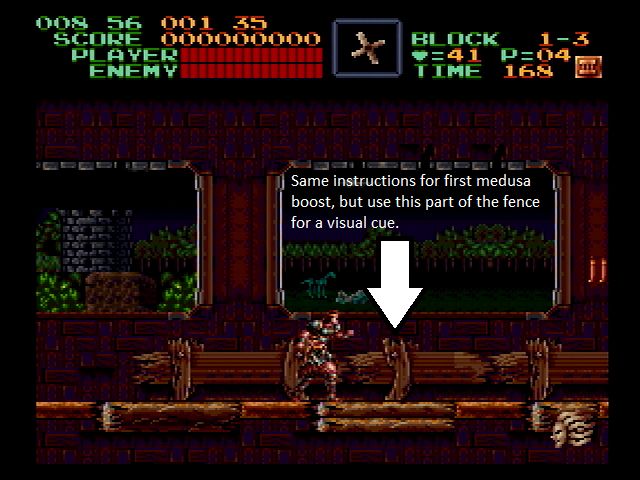
| − | [[File: | + | [[File:Stage 1 2nd Medusa Head Boost.jpg]] |
Notes: | Notes: | ||
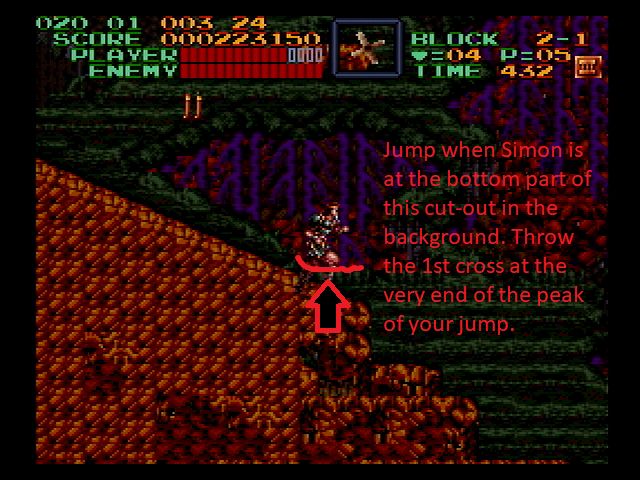
| − | [[File: | + | [[File:Stage 2 Jay_Cee Armadillo Kills.jpg]] |
| − | Notes: | + | Notes: Jay_Cee's Armadillo Kill |
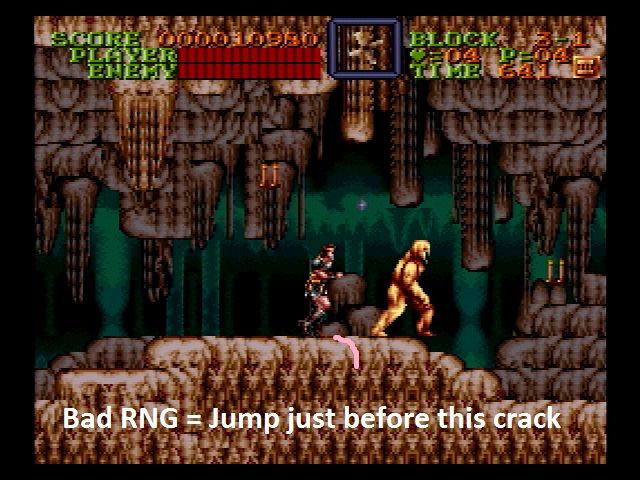
| − | [[File: | + | [[File:3-1 1st Mudmen Bad RNG.jpg]] |
| − | Notes: | + | Notes: Whip down at the Mudmen a later than usual. This will ensure that even with the worst pattern (where the Mudmen hugs the corner), Simon will not take damage. |
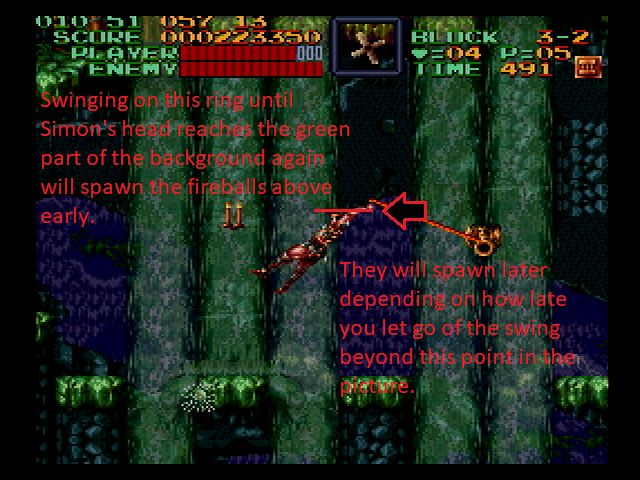
| − | [[File: | + | [[File:Stage 3-2 Fireball Boost Setup.jpg]] |
Notes: | Notes: | ||
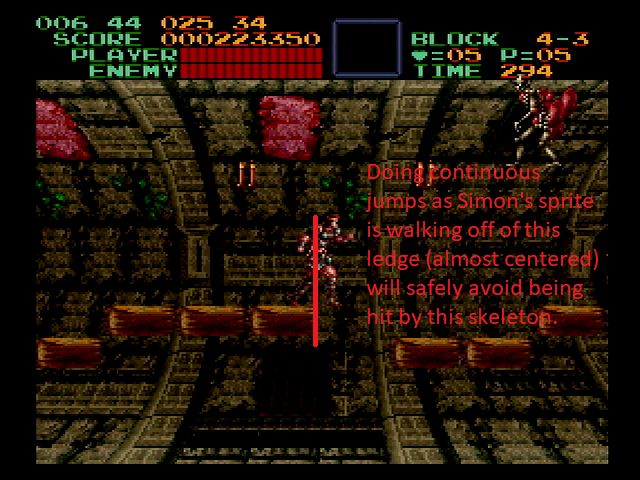
| − | [[File: | + | [[File:Stage 4-3 Skeleton Jump 01.jpg]] |
Notes: | Notes: | ||
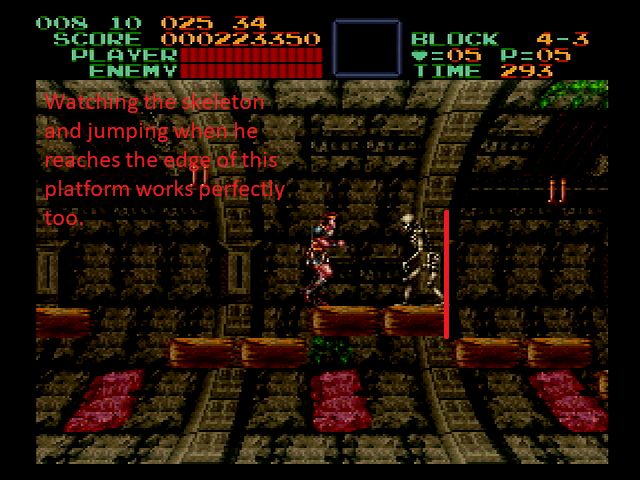
| − | [[File:Stage | + | [[File:Stage 4-3 Skeleton Jump 02.jpg]] |
Notes: | Notes: | ||
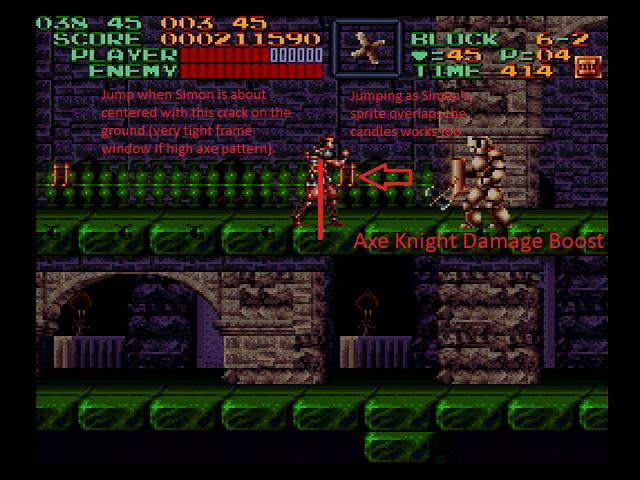
| − | [[File:Stage | + | [[File:Stage 6-2 Axe Knight Boost.jpg]] |
Notes: | Notes: | ||
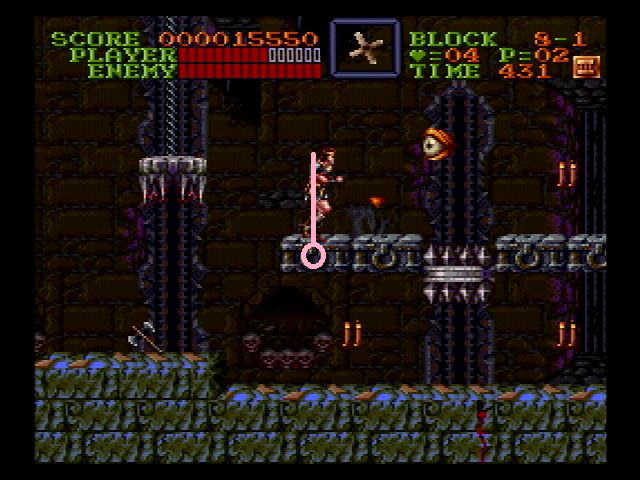
| − | [[File: | + | [[File:8-1 Eyeboost.jpg]] |
| − | Notes: | + | Notes: Jump when Simon's sprite is centered with the circle design on the platform (marked in purple). There are many different ways to do this damage boost. |
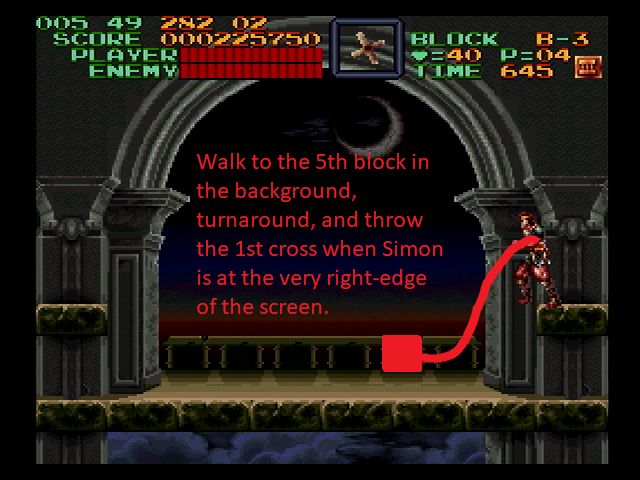
| − | [[File: | + | [[File:Gaibon 01.jpg]] |
Notes: | Notes: | ||
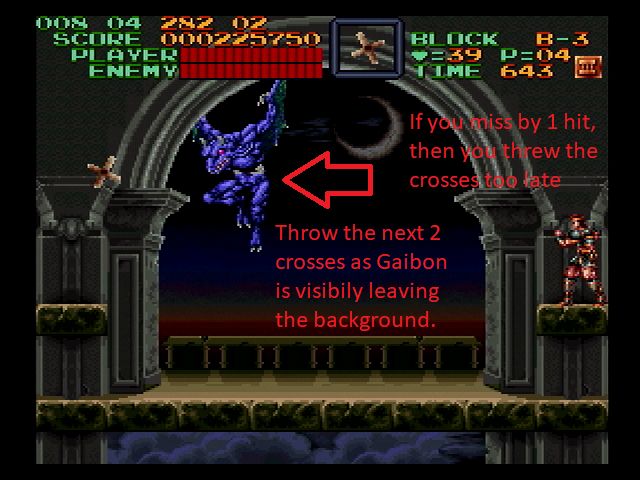
| − | [[File: | + | [[File:Gaibon 02.jpg]] |
Notes: | Notes: | ||
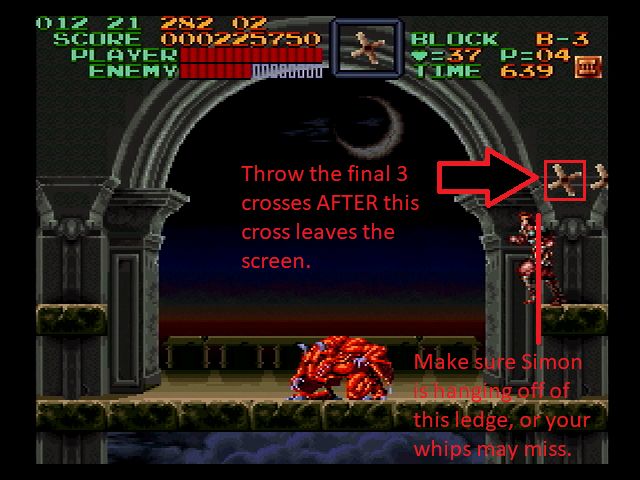
| − | [[File: | + | [[File:Gaibon 03.jpg]] |
Notes: | Notes: | ||
| − | [[File: | + | [[File:Gaibon 04.jpg]] |
Notes: | Notes: | ||
| Line 89: | Line 89: | ||
[[File:Stage 8 Early Orb Jump Pixel.jpg]] | [[File:Stage 8 Early Orb Jump Pixel.jpg]] | ||
| − | Notes: | + | Notes: This is an image of the left-most pixel Simon can stand on this platform. This is required for the early orb grab (which is a 50/50 chance due to collision detection only detecting every other frame). |
[[File:Stage A Early Orb Setup.jpg]] | [[File:Stage A Early Orb Setup.jpg]] | ||
| Line 100: | Line 100: | ||
[[File:WallClipTPpixel4.jpg]] | [[File:WallClipTPpixel4.jpg]] | ||
| − | Notes: | + | Notes: These are the 4 pixels where Simon can jump into the screen transition [NOTE: Only relevant when performing the wall clip.] |
Revision as of 13:19, 2 October 2019
Contents
Just_Defend's Tutorials
CV4 Beginner's Tutorial for Speedruns: Part 1
CV4 Beginner's Tutorial for Speedruns: Part 2
CV4 Beginner's Tutorial for Speedruns: Part 3
CV4 Tutorial Advanced Tips + Tricks
JoeDamillio's (Most) Bosses Tutorial
Picture Tutorials by JoeDamillio
Notes:
Notes:
Notes: Jay_Cee's Armadillo Kill
Notes: Whip down at the Mudmen a later than usual. This will ensure that even with the worst pattern (where the Mudmen hugs the corner), Simon will not take damage.
Notes:
Notes:
Notes:
Notes:
Notes: Jump when Simon's sprite is centered with the circle design on the platform (marked in purple). There are many different ways to do this damage boost.
Notes:
Notes:
Notes:
Notes:
Notes: This is an image of the left-most pixel Simon can stand on this platform. This is required for the early orb grab (which is a 50/50 chance due to collision detection only detecting every other frame).
Notes:
Notes: These are the 4 pixels where Simon can jump into the screen transition [NOTE: Only relevant when performing the wall clip.]
