Difference between revisions of "Cv4/tutorials"
From Castlevania Speedrunning
Bogaabogaa (talk | contribs) |
Bogaabogaa (talk | contribs) (→JoeDamillio Cues and Picutre Tutorial) |
||
| Line 20: | Line 20: | ||
== JoeDamillio Cues and Picutre Tutorial == | == JoeDamillio Cues and Picutre Tutorial == | ||
| + | |||
| + | |||
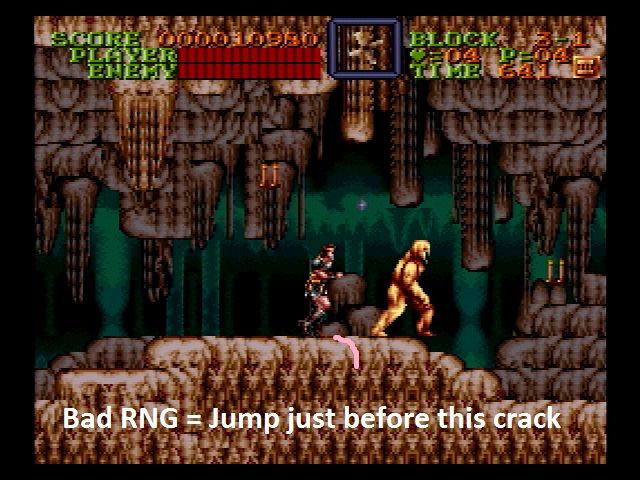
| + | [[File:3-1 1st Mudmen Bad RNG.jpg]] | ||
| + | |||
| + | Notes: | ||
| + | |||
| + | |||
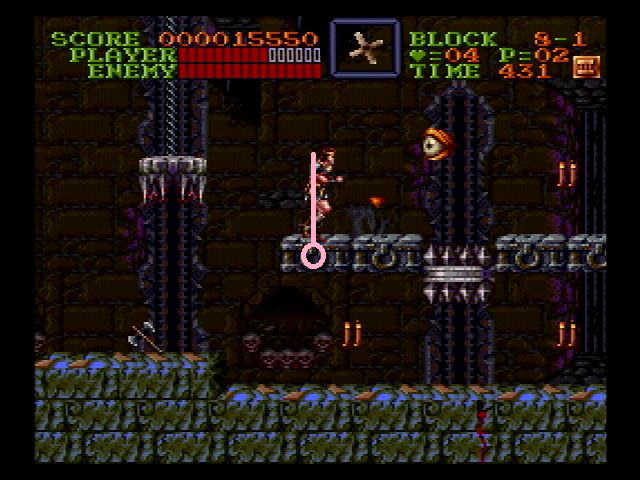
| + | [[File:8-1 Eyeboost.jpg]] | ||
| + | |||
| + | Notes: | ||
| + | |||
| + | |||
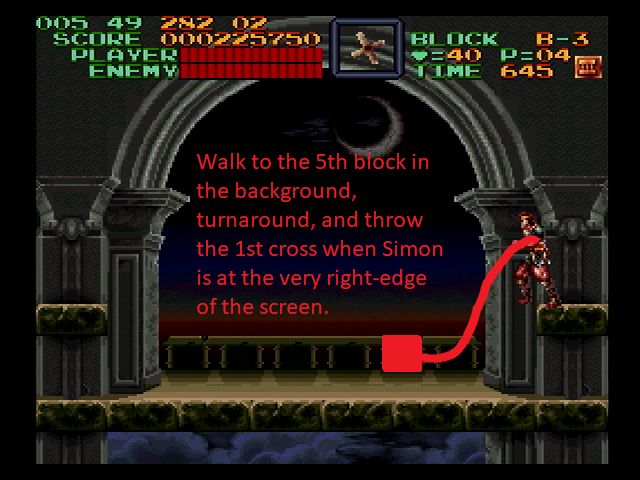
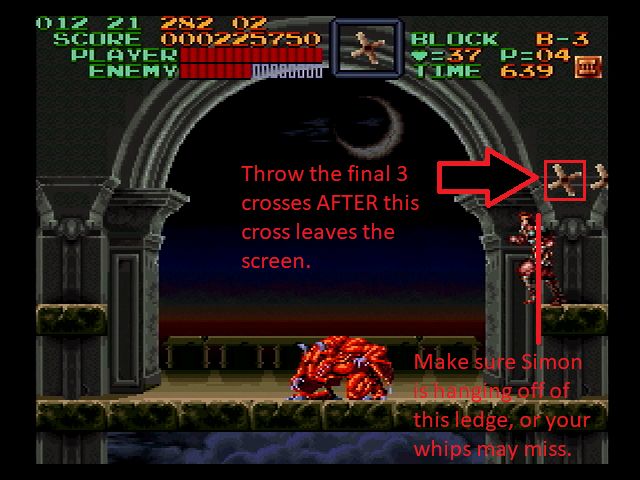
| + | [[File:Gaibon 01.jpg]] | ||
| + | |||
| + | Notes: | ||
| + | |||
| + | |||
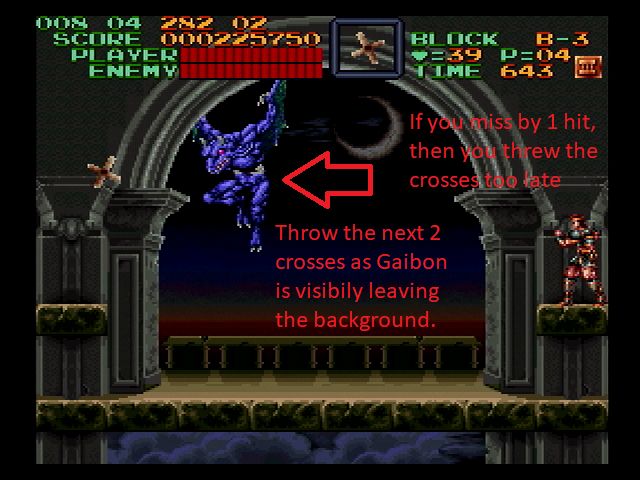
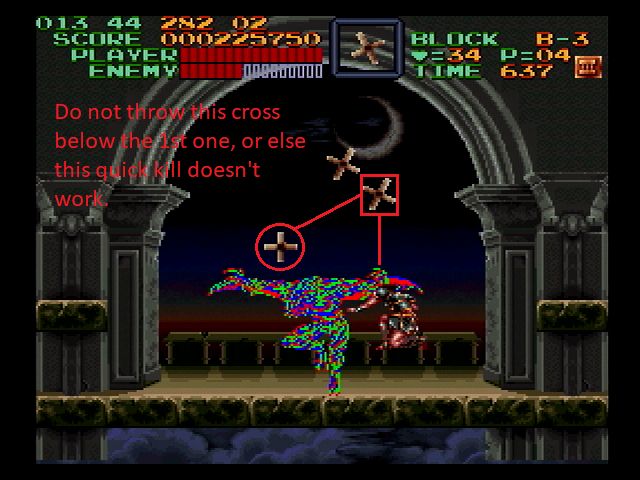
| + | [[File:Gaibon 02.jpg]] | ||
| + | |||
| + | Notes: | ||
| + | |||
| + | |||
| + | [[File:Gaibon 03.jpg]] | ||
| + | |||
| + | Notes: | ||
| + | |||
| + | |||
| + | [[File:Gaibon 04.jpg]] | ||
| + | |||
| + | Notes: | ||
| + | |||
| + | |||
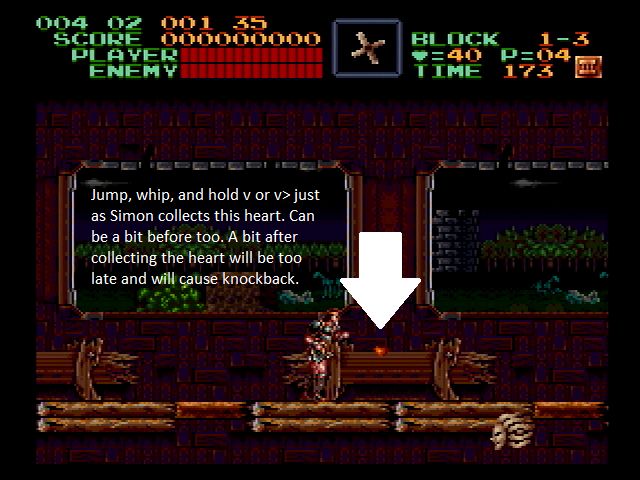
| + | [[File:Stage 1 1st Medusa Head Boost.jpg]] | ||
| + | |||
| + | Notes: | ||
| + | |||
| + | |||
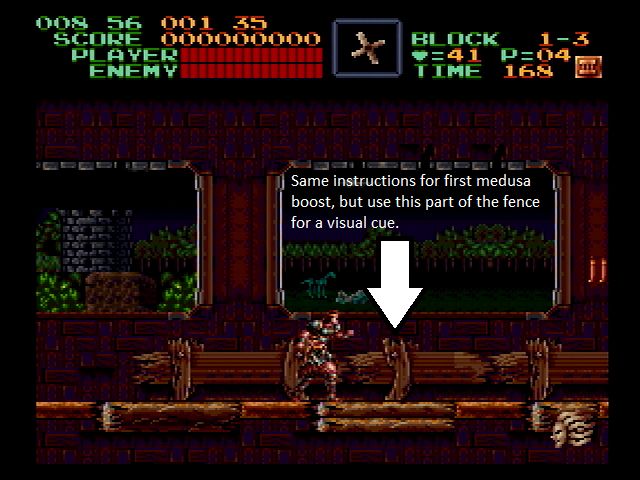
| + | [[File:Stage 1 2nd Medusa Head Boost.jpg]] | ||
| + | |||
| + | Notes: | ||
| + | |||
| + | |||
| + | [[File:Stage 2 Jay_Cee Armadillo Kills.jpg]] | ||
| + | |||
| + | Notes: | ||
| + | |||
| + | |||
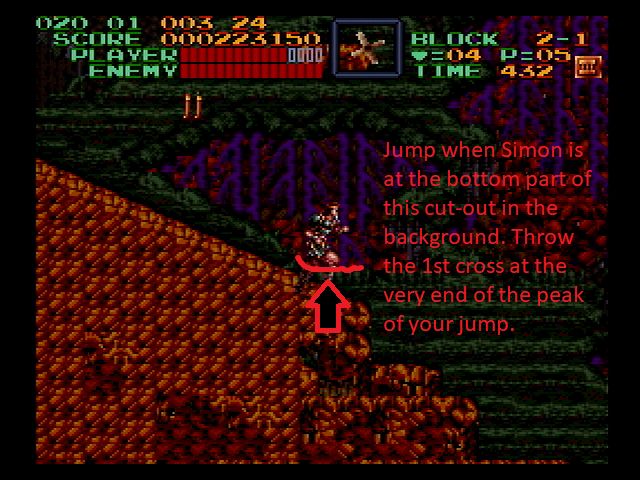
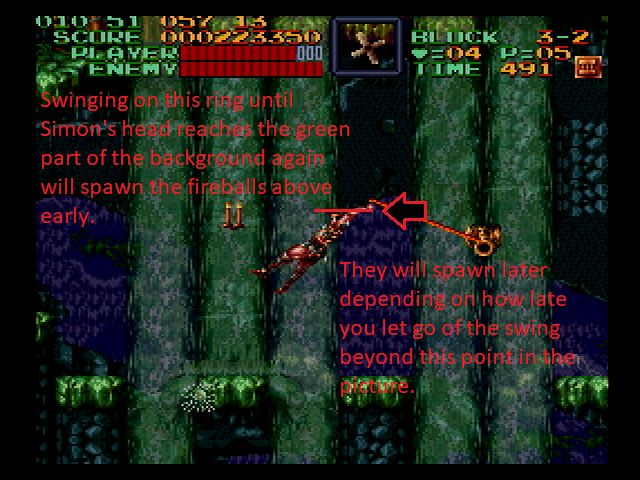
| + | [[File:Stage 3-2 Fireball Boost Setup.jpg]] | ||
| + | |||
| + | Notes: | ||
| + | |||
| + | |||
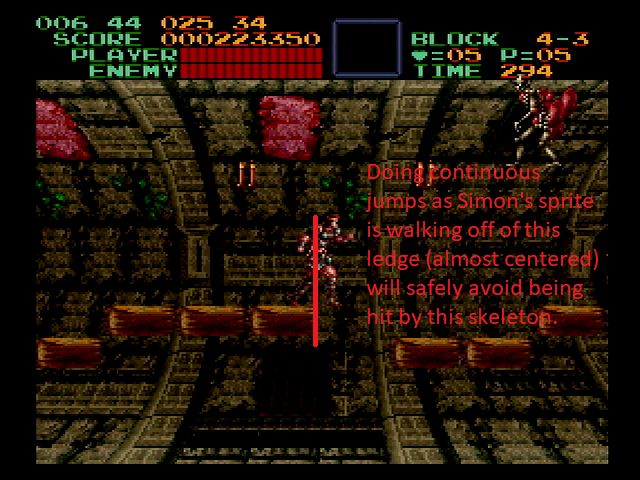
| + | [[File:Stage 4-3 Skeleton Jump 01.jpg]] | ||
| + | |||
| + | Notes: | ||
| + | |||
| + | |||
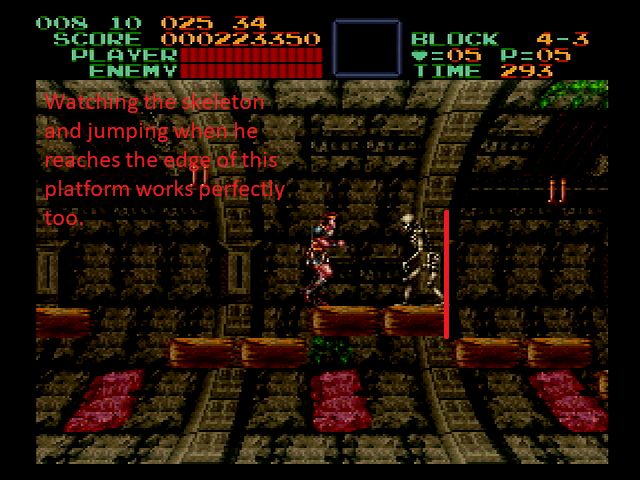
| + | [[File:Stage 4-3 Skeleton Jump 02.jpg]] | ||
| + | |||
| + | Notes: | ||
| + | |||
| + | |||
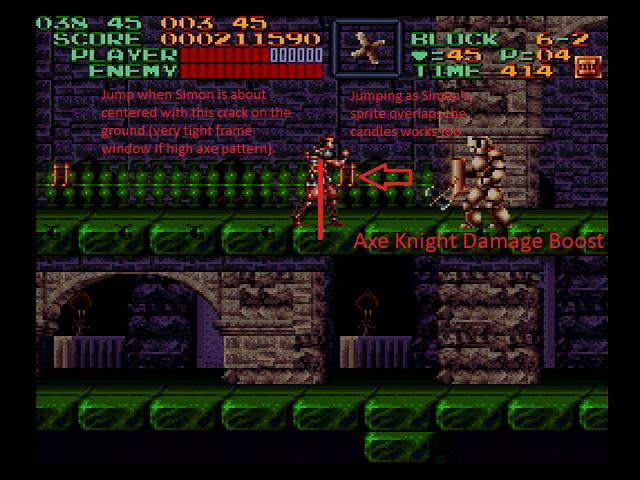
| + | [[File:Stage 6-2 Axe Knight Boost.jpg]] | ||
| + | |||
| + | Notes: | ||
| + | |||
| + | |||
| + | [[File:Stage 8 Early Orb Jump Pixel.jpg]] | ||
| + | |||
| + | Notes: | ||
| + | |||
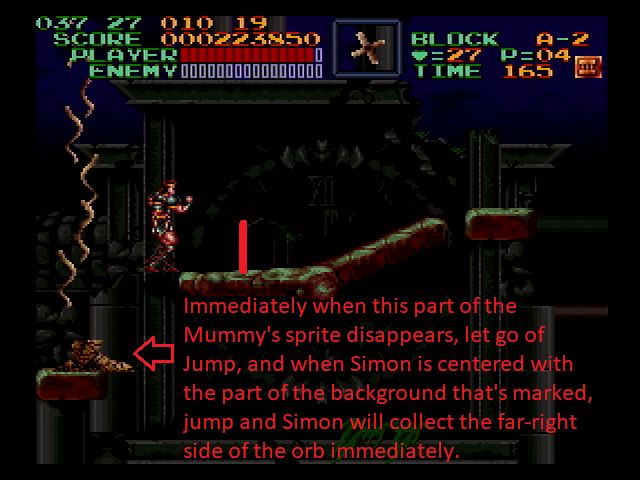
| + | [[File:Stage A Early Orb Setup.jpg]] | ||
| + | |||
| + | Notes: | ||
| + | |||
| + | [[File:WallClipTPpixel1.jpg]] | ||
| + | [[File:WallClipTPpixel2.jpg]] | ||
| + | [[File:WallClipTPpixel3.jpg]] | ||
| + | [[File:WallClipTPpixel4.jpg]] | ||
| + | |||
| + | Notes: | ||
Revision as of 18:18, 23 September 2019
Contents
Just Defends Tutorials
CV4 Beginner's Tutorial for Speedruns: Part 1
CV4 Beginner's Tutorial for Speedruns: Part 2
CV4 Beginner's Tutorial for Speedruns: Part 3
CV4 Tutorial Advanced Tips + Tricks
JoeDamillio Boss Tutorial
JoeDamillio Cues and Picutre Tutorial
Notes:
Notes:
Notes:
Notes:
Notes:
Notes:
Notes:
Notes:
Notes:
Notes:
Notes:
Notes:
Notes:
Notes:
Notes:
Notes:
