Difference between revisions of "Cv4/stage8"
From Castlevania Speedrunning
(→Bottom Route) |
|||
| (11 intermediate revisions by the same user not shown) | |||
| Line 16: | Line 16: | ||
*At 0:47 is important to note that you will spawn an extra bone dragon if you whip any candles or kill the eyeball after the crushers. | *At 0:47 is important to note that you will spawn an extra bone dragon if you whip any candles or kill the eyeball after the crushers. | ||
*At 1:11 if your health is good you may not need to grab the wall meat, it is optional. | *At 1:11 if your health is good you may not need to grab the wall meat, it is optional. | ||
| + | *At 1:14 for reference you can see the [https://www.youtube.com/watch?v=szjsd3R1Dfk time comparison] between this and the more optimal way to do this room (safe method loses ~18f). | ||
== Optimal Route == | == Optimal Route == | ||
| + | '''Important Stage Notes''' | ||
* It is important to note that the stage will start with the first crusher in different positions. '''Top route''' will be determined if the crusher is at the bottom and allows you to jump immediately on to it. And '''bottom route''' will be determined if you have to wait for the crusher to jump on. | * It is important to note that the stage will start with the first crusher in different positions. '''Top route''' will be determined if the crusher is at the bottom and allows you to jump immediately on to it. And '''bottom route''' will be determined if you have to wait for the crusher to jump on. | ||
| − | + | * '''Vegas Bridge''' refers to the bridge at the end of the stage, its patterns are random and most top runs will 'gamble' by take a boost off the broke stairs which if done correctly is roughly 50/50 in survival rates. Hence why it is called Vegas bridge. | |
| − | |||
| − | * ''' | ||
| − | |||
=== Bottom Route === | === Bottom Route === | ||
{{#ev:youtube|sXqYlIAJneo|560||}} | {{#ev:youtube|sXqYlIAJneo|560||}} | ||
| + | '''Notes:''' | ||
| + | *Will need to add a single optimal video for this. | ||
| + | |||
<div class="toccolours mw-collapsible mw-collapsed" style="width:700px"> | <div class="toccolours mw-collapsible mw-collapsed" style="width:700px"> | ||
| Line 42: | Line 44: | ||
{{#ev:youtube|vv4Xg6Z0MWQ|560}} | {{#ev:youtube|vv4Xg6Z0MWQ|560}} | ||
| − | + | '''Notes:''' | |
| + | *I did not go for vegas since it is not save to do. A death there will cost you the sub 32 run. | ||
| + | |||
<div class="toccolours mw-collapsible mw-collapsed" style="width:770px"> | <div class="toccolours mw-collapsible mw-collapsed" style="width:770px"> | ||
| Line 66: | Line 70: | ||
| − | <div class="toccolours mw-collapsible mw-collapsed" style="width: | + | <div class="toccolours mw-collapsible mw-collapsed" style="width:600px"> |
'''8-1 Easier 1f Jump Set-Up''' | '''8-1 Easier 1f Jump Set-Up''' | ||
<div class="mw-collapsible-content"> | <div class="mw-collapsible-content"> | ||
{{#ev:youtube|oxic8EwvLSs|560||}} | {{#ev:youtube|oxic8EwvLSs|560||}} | ||
| − | |||
| − | |||
| − | |||
| − | |||
| − | |||
| − | |||
| − | |||
</div> | </div> | ||
</div> | </div> | ||
| − | <div class="toccolours mw-collapsible mw-collapsed" style="width: | + | <div class="toccolours mw-collapsible mw-collapsed" style="width:600px"> |
'''8-2 Stair Boost''' | '''8-2 Stair Boost''' | ||
<div class="mw-collapsible-content"> | <div class="mw-collapsible-content"> | ||
| Line 98: | Line 95: | ||
</div> | </div> | ||
</div> | </div> | ||
| − | |||
| − | |||
| − | |||
| − | |||
| − | |||
| − | |||
| − | |||
| − | |||
| − | |||
| − | |||
| − | |||
| − | |||
| − | |||
| − | |||
| − | |||
| − | |||
| − | |||
| − | |||
| − | |||
| − | |||
| − | |||
| − | |||
| − | |||
| − | |||
== Boss: The Monster == | == Boss: The Monster == | ||
Revision as of 01:34, 25 July 2022
 | |
| Game | Super Castlevania IV |
|---|---|
| Level sections | 8-1, 8-2 |
| Level name | Catacombs |
| Previous level | Stage 7 |
| Next level | Stage 9 |
Contents
Safe Route
Notes:
- This route showcases a safe way to get through the first screen in 8-1 and avoids any extra damage boosts. It is intended for those who want to achieve sub 40 minutes.
- At 0:33 you need to jump early from the middle of the bone pillar to the next platform, your iframes are much shorter from the blood/goo.
- At 0:47 is important to note that you will spawn an extra bone dragon if you whip any candles or kill the eyeball after the crushers.
- At 1:11 if your health is good you may not need to grab the wall meat, it is optional.
- At 1:14 for reference you can see the time comparison between this and the more optimal way to do this room (safe method loses ~18f).
Optimal Route
Important Stage Notes
- It is important to note that the stage will start with the first crusher in different positions. Top route will be determined if the crusher is at the bottom and allows you to jump immediately on to it. And bottom route will be determined if you have to wait for the crusher to jump on.
- Vegas Bridge refers to the bridge at the end of the stage, its patterns are random and most top runs will 'gamble' by take a boost off the broke stairs which if done correctly is roughly 50/50 in survival rates. Hence why it is called Vegas bridge.
Bottom Route
Notes:
- Will need to add a single optimal video for this.
Alternative Bottom Route
Notes:
- This is the Hanage route and showcases another way to do bottom route [time difference unsure]
Top Route
Notes:
- I did not go for vegas since it is not save to do. A death there will cost you the sub 32 run.
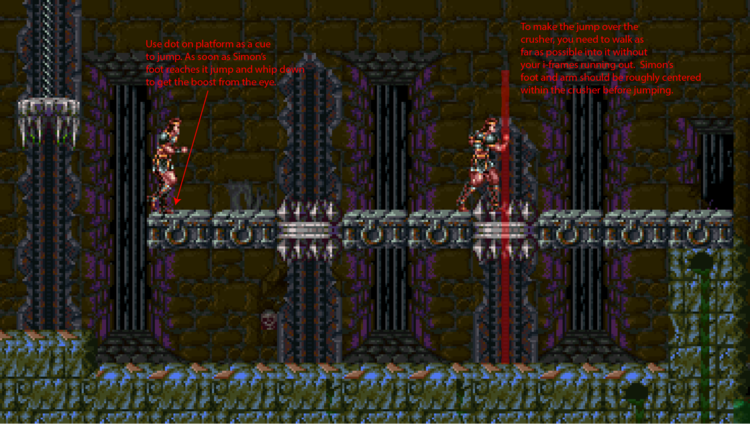
8-1 Eyeball Boost Visual Cue
Notes:
- The visual cue above is intended for whipping the eyeball downward.
- Whipping down is a much tighter frame window to make it through the subsequent crusher. You can opt to do a limp whip but the visual cue may be different.
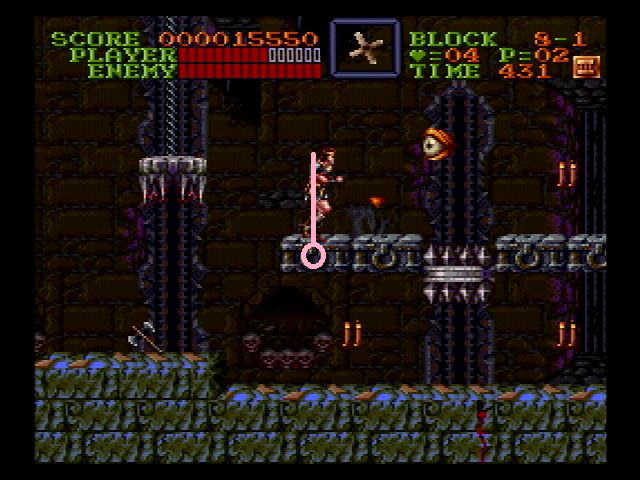
Visual Cue Option 2
Notes:
- Jump when Simon's sprite is centered with the circle design on the platform (marked in purple). There are many different ways to do this damage boost.
8-1 Easier 1f Jump Set-Up
8-2 Stair Boost
Notes:
- Press B then Y at the same time while holding right + down.
- It saves around 25-30 frames (~.4 to ~.5 sec) for the cost of 2 HP.
- It can also be used to get past the crushers early without doing the stair jump (it is about as fast but costs HP).
8-2 Stairs Leap Time Comparisons
Notes:
- 4 Options for clearing the 8-2 stairs leap/boost section of the room, each compared.
Boss: The Monster
Early Orb
Notes:
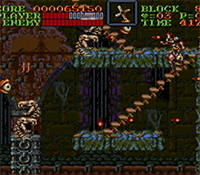
- This is an image of the left-most pixel Simon can stand on this platform. This is required for the early orb grab (which is a 50/50 chance due to collision detection only detecting every other frame).

