Cv1/level1
From Castlevania Speedrunning
This article is a heavy WIP.
 | |
| Game | Castlevania |
|---|---|
| Level sections | Stage 1, Stage 2, Stage 3 |
| Level name | 1 |
| Previous level | None |
| Next level | Level 2 |
[Show/Hide] Stage 01
Simple
Recommended to newcomers
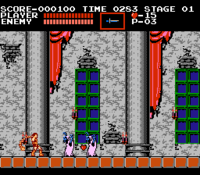
- Jumping into the gate as shown is faster. This is because as soon as Simon touches the castle entrance, the game automatically moves him at a slower speed, so you want to jump to preserve normal speed.
- How to deal with zombies.
- When to get the whip (don't get it off the first low candle).
- Dealing with zombies at the end.
- To deal with the triple zombie pattern, damage boost (gif)
Stopwatch Manipulation (Optimal)
- The optimal frame to jump into gate is the one shown in the video, where Simon turns around for a very brief moment before going into the castle.
- Aim to get the Stopwatch off the first zombie. Break the first candle to get the whip upgrade, then jump and whip the zombie on landing. Whipping to get the Stopwatch is a 1-frame window.
- Pay attention if there's two or more zombies at the start, as the additional zombie will also generate a Money Bag if the Stopwatch drops and it'll advance the item chart to Slot 2 (this would be the Holy Water but it gets turned into a money bag due to the Important Item Rule). This needs to be taken into consideration later for a more optimal Level 3.
- If you successfully got the stopwatch already, go through the second wave of zombies as shown in the video to make it less likely to collect additional item drops (Add picture with visual cue for first jump)
If you don't have a Stopwatch by the second wave, use this strat:
- You should aim to get the stopwatch on these two zombies showcased. The exact timing of the whips to get the stopwatch depends on how much time has already been lost whipping previous zombies: the more time has been lost, the earlier your whip will have to be to get the stopwatch.
- If the first zombie in this wave doesn't spawn, you should delay the whip on the second zombie by a lot.
Alternate Watch Manip Strats
- This watch manipulation is a lot more complex as the actions are different from pattern to pattern, but it can always avoid a second item drop from happening in this stage, and some people may find the timing a little less awkward on some of these patterns.
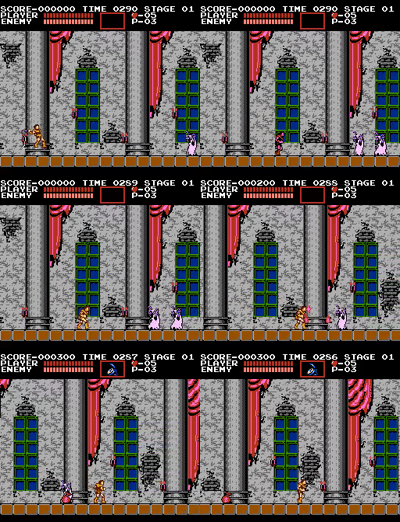
- In order, the patterns shown are the Space Zombies (one zombie, a space, one zombie), the Couple (two zombies), the Triplet (three zombies), the Triplet with heart drops, and the Solo pattern (one unusable zombie and no more trailing zombies).
- On the Solo pattern, you will have to get the Stopwatch on the second wave. It is recommended to lose a few frames before the second wave with a stutter to help with the timing.
- Remember that if you don't get the Stopwatch on the first wave, you will have to adjust the whip timing for second wave depending on exactly how many frames have been lost whipping these first zombies. Usually, the Space zombies will lose fewer frames and demand a later timing, while the Couple and Triplet will lose more and demand an earlier timing.
TAS Framerule
(Captcha's clip)
- It's stupid.
[Show/Hide] Stage 02
Easier Bat Boost
Recommended to newcomers
- Stand on a pixel perfect location. (Add picture) This will force the bat to force an item as soon as it hits Simon. If no other item drops have occurred yet, this item will be a Stopwatch.
- If you fail the Stopwatch manipulation or you get another item drop, it's recommended to not retry it and continue with the setup instead. Fall back on the backup Axe strats for stage 03 if you leave this stage without a Stopwatch.
- As soon as Simon lands back on his feet from the knockback, whip while still in the crouched position and start holding right. Perform the jump and the other whip stall where shown in the video to manipulate the bat's Y position and be able to boost over.
Early Boost (Stopwatch)
- The first bat will spawn on the second frame of the room. Thus, by activating the Stopwatch on the first frame of control, it's possible to delay its spawn and make the boost with the first bat. This saves ~4 seconds.
- While the bat will spawn on the second frame of the room, its visual model will spawn on the third frame. This means that if the Stopwatch is used on the second frame, it will look like the bat is not present, while in reality it has already spawned in the top right. It's not possible to boost over using this bat spawn.
- By holding left+up and pushing B at the start of the room, it's possible to tell early if the Stopwatch has been activated on the first or second frame. If Simon keeps facing right after the activation, it means that it was done on the first frame, while if Simon faces left, that means it was done on the second frame, making the boost impossible. Switch to right ASAP after activating the Stopwatch (in the middle of the whip animation).
- While the bat will spawn on the second frame of the room, its visual model will spawn on the third frame. This means that if the Stopwatch is used on the second frame, it will look like the bat is not present, while in reality it has already spawned in the top right. It's not possible to boost over using this bat spawn.
- Perform the whip stalls and the jump where shown in the video to manipulate the bat's Y position in order to boost over.
- You can jump over the big heart if you intend on resetting for a missed crit in in stage 03, otherwise feel free to take it. The jump does not help manipulate the bat's Y position so you can skip it if you want to pick up the big heart.
Optimal Early Boost (Stopwatch)
- Same principle as the other Early Boost method shown above, but the movements are slightly different so that an additional framerule may be saved. This is significantly more difficult.
- Two grounded whip stalls are made and then one on jump landing to lose a few more frames. The timing for this whip is a bit specific. Whip too early and you will break the candle, potentially getting a heart drop, and the bat will likely spawn too low. Whip too late, ad the bat will likely spawn too high.
- This landing whip can also be replaced with a simple stutter.
- Jump immediately as soon as you drop off the block. The earlier, the lower the bat will spawn and usually the easier the boost will be.
- You can do small stutter before jumping in for the boost to make it a little easier to hit the back of the bat and boost forward. As long as the stutter is kept tiny, you will still make the framerule.
- One side effect of doing this stutter is that it increases the chances of getting the bat to drop an item after boosting, which will advance the item chart.
Backups
Manual Bat Boost
- (Waiting at the ledge)
- Mainly to be used as a backup if the Bat Boost failed.
[Show/Hide] Stage 03
Simple Stopwatch kill
- Boss's pattern is dependent on how many frames have elapsed since the start of the screen.
- Get potion, clunk off the ledge.
- Get into position, let Bat go through Simon, activate Stopwatch, go ham.
- Orb Grab.
- This can also be used as a backup for the Crit strat.
Simple Crit attempt + backup Stopwatch kill
Recommended to newcomers
- Boss's pattern is dependent on how many frames have elapsed since the start of the screen.
- Clunk, get consistent pattern.
- Crit.
- As a backup, activate the stopwatch and kill the bat there. You need to press either up+B on the same frame, or B 1 frame after pressing up, to avoid climbing the step (Can point to the simple stopwatch kill, append a gif, or just show it in the video) (Add picture with visual cues, for this crit and for the others).
Advanced Crit (Optimal)
- Boss's pattern is dependent on how many frames have elapsed since the start of the screen.
- Whip cancel landing off ledge, possibly skip potion.
(LInk to video of 3-frame pattern)
- Slower, but but acceptable. Explanation.
(Link to video of 2-frame pattern)
- Explanation
(Link to video of 1-frame pattern)
- Explanation
(Link to video of 0-frame pattern (TASCrit))
- Explanation, point out that this is best pattern
(Link to video of clunk (Also TASCrit))
- Just to point out that a clunk gives you TASCrit)
(LInk to video of more patterns possibly? We just do the 2-frame movement for those anyway. Point this out in some way)
Backups
Rare Double Zombie pattern
(Link to video)
- For Stopwatch/Crit users
- Take the boost, jump clunk.
Late jump on TASCrit
(Link to video)
- Explanation
Axe strats
- Recommended to be used as a backup if the stopwatch manipulation failed in stage 02, though it can be used in alternative to the stopwatch kill if really struggling with the up+B press.
- Keep in mind that not having the stopwatch for level 2 will make it slower and more difficult.
- Get potion.
- Position Simon in correct spot for Axe kill on boss.
- Orb grab
Truefalse's tutorial on Bat Crit
Can probably remove this once the page is done, this video is already in the Tutorials page anyway.
Boss
Critical hit glitch (optimal)
Tutorial by Truefalse
