Cv1/dracula
 | |
| Game | Castlevania |
|---|---|
| Level sections | Dracula |
| Level name | 6 |
| Previous level | Level 6 |
| Next level | None |
This article is a heavy WIP - for anything beyond basic to intermediate strategies please refer to SBD Wolf's World Record strat video https://www.twitch.tv/videos/1048136981
[Show/Hide] Phase 1
Simple
Recommended to newcomers
(Video Link)
- 3-cycle attempt with 5-cycle backup
- Explain left-right switching, how spawns and fireball patterns work
2-Cycle: Descending Crit
- Easier to learn
- Thoroughly explain movements and visual cues
- Optional whip buffer (not recommended)
- Frame perfect descending crit variant to keep it simple and let people focus on movement
- 3-Cycle backup (maybe put this section under backups?)
- Refer to backups if missed backward jump
- If fast pattern, either fall back on old school 3-cycle attempt, or refer to the Pause Buffer Section
2-Cycle: Ascending Crit
- More difficult to learn, but more lenient
- Thoroughly explain movements and visual cues
- Optional whip buffer (not recommended)
- Explain Ascending Whip setup (aim for 2-frame stagger pixels)
- 3-Cycle backup (maybe put this section under backups?)
- Refer to backups if missed backward jump
- If fast pattern, either fall back on old school 3-cycle attempt, or refer to the Pause Buffer Section
Fast Pattern 2-Cycle: Pause Buffer
- Give frame number
- Append this chart:
Pause Buffer Patterns
"x frames pause" means pressing start once, and repressing it to unpause x frames later. These spawns happen if Simon does the 2-cycle movement after a pause buffer on the fast pattern. -2 frames pause: normal 2-cycle spawn that we're used to, but attack speed seems RNG. -3 frames pause: Dracula spawns just left of the mid-left candle. -4 frames pause: Dracula spawns just right of the leftmost candle. -5 frames pause: Dracula spawns on top of Simon, hitting him. -6 frames pause: Dracula spawns on top of Simon, hitting him (same as 5 frames pause). -7 frames pause: Dracula spawns just right of the leftmost candle. -8 frames pause: Dracula spawns just right of the mid-left candle. -9 frames pause: Dracula spawns on the far right. Attack speed seems RNG. -10 frames pause: Normal 2-cycle spawn. Fixed attack speed. Aim for this one. -11 frames pause: Dracula spawns just left of the mid-left candle. -12 frames pause: Dracula spawns just right of the leftmost candle. -13 frames pause: Dracula spawns on top of Simon, hitting him. -14 frames pause: Dracula spawns on top of Simon, hitting him. (same as 13 frames pause). -15 frames pause: Dracula spawns just right of the leftmost candle. -16 frames pause: Dracula spawns just right of the mid-left candle. -17 frames pause: Dracula spawns on the far right. Attack speed might be fixed here. -18 frames pause: Normal 2-cycle spawn. Seems to continue on this pattern.
- Explain how to go about the fight if missed pause buffer
Hitless 3-Cycle
- Explanation
Backups
Missed Crit on 2-Cycle Strat
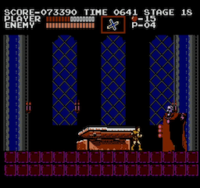
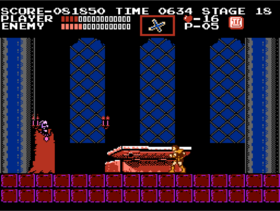
- Refresh rate in the video makes it a little unclear where Simon should be positioned for the backup. Here is the general location.
Missed Backward Jump on 2-cycle Strat
- Ideally you react in time to missing the backward jump and you stop throwing crosses, which would break the candles on the left. If you do break those candles, you will have to fight the cookie monster with a single shot holy water or even with the cross.
Death Recovery
(Video Link)
[Show/Hide] Phase 2
Standard After 3-Cycle
- You ideally want to have 12-14 hearts at the beginning of Phase 2 for this strat
- Pickup holy water and triple multiplier and position yourself approximately 1 whip length from Dracula
- The whip before the transformation is used to both gauge this distance and for a timing mechanism
- You can get 2 jump whips in before the first available jump
- Be sure to hold B after the 2nd whip. This will manipulate Drac into a quick short hop.
- Once landed, stun Drac with a holy water while it is in the crounched position
- Begin with a jump whip followed by a holy water while falling to chain the stun lock
- The holy water will deal damage to Drac as long as it passes through its head
- If you miss a jump whip, ensure that you still throw a holy water to maintain the stun lock
Standard After 4-Cycle or higher
- Same strat as Standard After 3-cycle, you will just be setting up wherever you end up killing Drac in Phase 1
Standard After 2-Cycle
Simple Opening
- Easy 2-hit cross opening. Hold B after throwing the second cross to force the early jump.
Intermediate Opening
- 3-hit cross opening. For the second cross throw, press right, release, then jump to avoid getting a forward jump towards Cookie. Hold B after the second cross.
Optimal Opening
- 4-hit cross opening. Requires a just-frame backjump input for the first cross. Hold B after whipping the Holy Water candle.
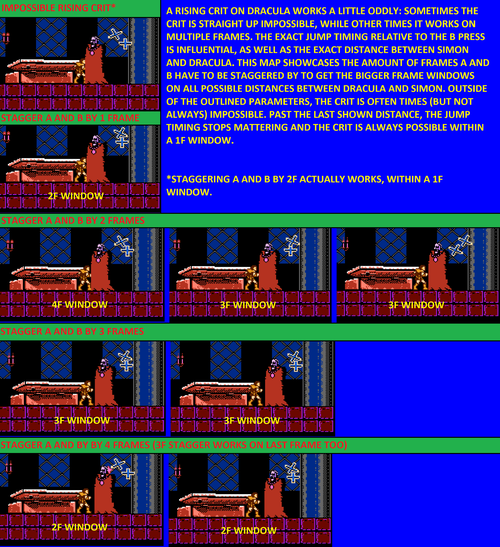
Drac Crit Chart
Tyson Cookie
- This can be done after any Phase 1 and after any opening.
- Requires fewer hearts. You can skip a big heart at the end of Stage 17 if good pattern on 17-2 fleamen.
- Think of each jump whip and falling whip as a set. Each whip input of each set of whips (jump whips and down whips) are frame perfect.
- The first whip needs to be staggered 1 frame after your jump input, and the falling whip needs to be input exactly 22 frames after the first whip input in order to connect.
- If you jump and get no whip, your jump and whip inputs were on the same frame
- If you input a second whip, but it did not come out, your input was early.
- Note the pink hit markers for each whip. If you do not see a hit marker for your falling whip, it did not deal damage and was too slow.
- Only worth going for if you can consistently get 4 or more sets of tyson whips, otherwise this loses time over the standard (Machine gun) strat.
Backups
Double Shot Fight
Recommended to newcomers
- This can also be used if you lack the hearts for the Standard Kill (Machine Gun)
- You can get in 2 jump whips per holy water
Single Shot Fight
- Recommend stunning immediately
- You can get in 3 jump whips per holy water
- When attacking, tap B for as little as possible to reduce the chances of the Cookie Monster jumping.
- If Cookie Monster poises to jump (raises arms/one leg), do NOT finish your current set of jump whips. Move to a safe distance and re-apply holy water stun lock.

