Cv1/dracula
 | |
| Game | Castlevania |
|---|---|
| Level sections | Dracula |
| Level name | 6 |
| Previous level | Level 6 |
| Next level | None |
This article is a heavy WIP
[Show/Hide] Phase 1
Simple
Recommended to newcomers
(Video Link)
- 3-cycle attempt with 5-cycle backup
- Explain left-right switching, how spawns and fireball patterns work
2-Cycle: Descending Crit
- Easier to learn
- Thoroughly explain movements and visual cues
- Optional whip buffer (not recommended)
- Frame perfect descending crit variant to keep it simple and let people focus on movement
- 3-Cycle backup (maybe put this section under backups?)
- Refer to backups if missed backward jump
- If fast pattern, either fall back on old school 3-cycle attempt, or refer to the Pause Buffer Section
2-Cycle: Ascending Crit
- More difficult to learn, but more lenient
- Thoroughly explain movements and visual cues
- Optional whip buffer (not recommended)
- Explain Ascending Whip setup (aim for 2-frame stagger pixels)
- 3-Cycle backup (maybe put this section under backups?)
- Refer to backups if missed backward jump
- If fast pattern, either fall back on old school 3-cycle attempt, or refer to the Pause Buffer Section
Fast Pattern 2-Cycle: Pause Buffer
- Give frame number
- Append this chart:
Pause Buffer Patterns
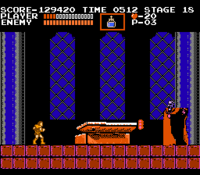
"x frames pause" means pressing start once, and repressing it to unpause x frames later. These spawns happen if Simon does the 2-cycle movement after a pause buffer on the fast pattern. -2 frames pause: normal 2-cycle spawn that we're used to, but attack speed seems RNG. -3 frames pause: Dracula spawns just left of the mid-left candle. -4 frames pause: Dracula spawns just right of the leftmost candle. -5 frames pause: Dracula spawns on top of Simon, hitting him. -6 frames pause: Dracula spawns on top of Simon, hitting him (same as 5 frames pause). -7 frames pause: Dracula spawns just right of the leftmost candle. -8 frames pause: Dracula spawns just right of the mid-left candle. -9 frames pause: Dracula spawns on the far right. Attack speed seems RNG. -10 frames pause: Normal 2-cycle spawn. Fixed attack speed. Aim for this one. -11 frames pause: Dracula spawns just left of the mid-left candle. -12 frames pause: Dracula spawns just right of the leftmost candle. -13 frames pause: Dracula spawns on top of Simon, hitting him. -14 frames pause: Dracula spawns on top of Simon, hitting him. (same as 13 frames pause). -15 frames pause: Dracula spawns just right of the leftmost candle. -16 frames pause: Dracula spawns just right of the mid-left candle. -17 frames pause: Dracula spawns on the far right. Attack speed might be fixed here. -18 frames pause: Normal 2-cycle spawn. Seems to continue on this pattern.
- Explain how to go about the fight if missed pause buffer
Hitless 3-Cycle
- Explanation
Backups
Missed Crit on 2-Cycle Strat
Missed Backward Jump on 2-cycle Strat
- Ideally you react in time to missing the backward jump and you stop throwing crosses, which would break the candles on the left. If you do break those candels, you will have to fight the cookie monster with a single shot holy water or even with the cross.
Death Recovery
(Video Link)
[Show/Hide] Phase 2
Standard After 3-Cycle
(Video Link)
- Manipulation info, let it jump once.
Standard After 4-Cycle or higher
(Video Link)
- Manipulation info, let it jump once.
Standard After 2-Cycle
Simple Opening
(Video Link)
- Easy 2-hit cross opening.
Intermediate Opening
(Video Link)
- 3-hit cross opening.
Optimal Opening
(Video Link)
- 4-hit cross opening.
Tyson Cookie
(Video Link)
- Showcase video after 2-Cycle Optimal Opening, but this can be done after any Phase 1 and after any opening.
- This is double frame perfect
- Visual cue if hit
- Only worth going for if consistent enough
- If going for this, needs fewer hearts, and can skip big heart at the end of Stage 17 if good pattern on 17-2 fleamen.
Backups
Double Shot Fight
(Video Link)
Single Shot Fight
(Video Link)
- When attacking, tap B for as little as possible to reduce the chances of the Cookie Monster jumping.