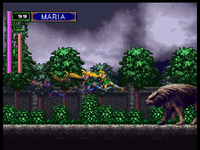
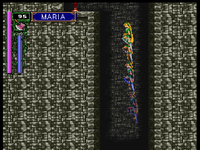
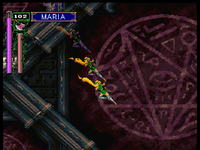
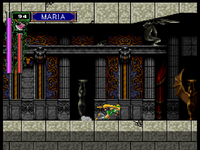
SOTN Maria All Bosses
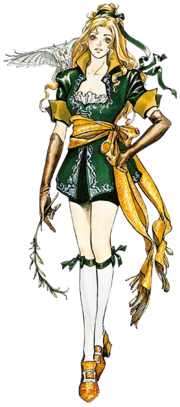
| Maria Renard | |
|---|---|
| |
| Platforms | Sega Saturn |
| Categories | Any% |
| All Bosses | |
This is intended to be a complete documentation of Maria's gameplay mechanics. The guide covers techniques from basic to advanced with example runs using safe, beginner-friendly strats. In addition to the speedrun route, I will also be including strats and techniques meant for stylish gameplay as a bonus - maybe some of the techniques shown can lead to new discoveries.
Maria is a fairly accessible character to play; not requiring mashing techniques like Alucard's shield dash, or the demanding execution needed to chain Blade Dashes as Richter. She has excellent spells and movement options and her run is mostly about knowledge of level layouts and the character mechanics - only 2 glitches are used, but they are fairly easy to understand and execute.
Contents
Moves List
Basic Moves
Walk/Run Maria doesn't auto-run in the Saturn version like she does in the PSP/Requiem version. You need to double tap. Walking should be avoided as much as possible even at beginner level, apart from a few specific spots where precise positioning is required for skips. Running can be a beginner-friendly alternative to the Flying Kick in some spots if you're scared of getting direction locked.
Jump Maria's jump is shorter than Alucard's and Richter's, so there are some platforms you can't clear with just one long button press. But, she has the ability to do a triple jump. Her jumps are used primarily to escape direction lock and to make minor adjustments mid-air.
Kick Nowhere near as reliable as Alucard's sword or Richter's whip in general.
MP Management
Many of Maria's best movement options will actually pause Maria's MP regeneration. This means that, in a speedrun, relying solely on the Four Beasts invincibiliyy spell isn't viable because she won't have enough MP to defeat the bosses.
This is an extensive list of the different properties each move has. Not everything is used in the speedrun, some things are mostly to make your gameplay more stylish and fluid.
Projectile Attack
If you're playing with a controller, I strongly recommend mapping one of the shoulder buttons as your projectile attack because it'll make it more comfortable to charge while doing other moves. It might feel uncomfortable at first, but you'll get used to it eventually and this attack really doesn't need to be used all that often.
- Level 1 (default, no charge)
- This is the only one that can be shot downwards
- Level 3 Fireball
- Recovery can be cancelled with a slide
- Level 4 Laser Beam
- Also provides a shield that can stop enemy projectiles
Flying Kick
- Hold the Kick button to go through enemies
- Let go of the Kick button to bounce off enemies
- Puts you in direction lock if not cancelled 🔒
- Nullifies landing recovery
- Hold Jump to increase height gained from the backflip
Uppercut
- To do diagonal super jump from the ground, do the input like this:


- Let go of the D-pad at the right time to preserve momentum
- To do an uppercut while changing the direction you're facing mid-air, you need to do a half-circle in the opposite direction like this:

- Maria uppercut can be controlled in different ways:
- Hold Forward to get more horizontal momentum
- Hold Back to get less momentum after a diagonal uppercut
- Hold Up-Forward to get a balance of height and distance
Dive Kick
![]()
![]() or
or ![]()
![]() - Can only be performed when you don't have any extra mid-air jumps.
- Can only be performed when you don't have any extra mid-air jumps.
- Can be cancelled into subweapon
- Preserves momentum
- Helps eliminate landing recovery if timed properly
- Enables other aerial action such as another dive kick or another super jump.
- You will slide across the floor if you do it after a Front Kick. It's similar in effect to Alucard's slide, but easier to execute.
- Input is preserved for long enough to allow you to go into a high jump afterwards
Slide
Optimal movement. Timing the input near the recovery animation to chain slides tends to be better than mashing.
- Needs the right spacing for it to kill enemies
- Ideal movement when you cast Level 3 Fireball
- Input is preserved for long enough that you can chain this into an uppercut if you slide off the edge of a platform
- Momentum is also preserved when you slide off the edge of a platform
- Landing recovery can be cancelled into slide making it good for damage boosts
Area Strats
Entrance
1st visit The fastest strategy here is to use Maria's level 3 fireball and chain slides. Keep in mind that this does make this section more RNG-heavy though. For a more conservative strategy, simply do Flying Kicks buffering them whenever you can.
For the second screen with the Wargs, you'll want to cast the fireball while still in the air.
2nd visit Once again, level 3 fireball and slides are the fastest strat, but it's more RNG-heavy. You can use the book to give yourself a little bit of extra protection
Alchemy Lab
If doing the dive kick into diagonal uppercut is too difficult, you can set up the uppercut by just doing 4 slides.
Marble Gallery
Clock rush is slightly different in the Saturn version because it utilizes the system clock.
Olrox's Quarters
Buffer the Axe throw to reduce landing recovery
Royal Chapel
Careful not to go past the Book. Make sure to end the Front Kick early by holding the opposite direction.
Castle Keep
Boss Strats
Slogra & Gaibon
There are essentially 3 viable strategies you can use depending on your skill level:
- Dragonbreath Spell
- Guardian Knuckle Combo
- Axe + Uppercut
Because the pattern of the Axe throw is random, sometimes the strat fails.
Olrox
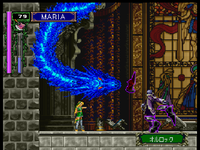
Seryuu is the go-to strategy here for speed. Try to cast it very close to him to maximize damage. Rotate the dragon clockwise when Olrox goes into his 2nd phase because this helps ensure the Dragon hits Olrox as it's leaving the screen.
You can throw axes a few times to get some damage in so that you're more likely to kill him with Seryuu without having to throw axes later.
Riskier strats go for Seryuu right away, but if you're playing safe you can wait a bit to see what he does. If he decides to jump backwards or levitate then you'll have to adjust. If you accidentally cast Guardian Knuckle, that will mess up the Hippogryph boss fight - something you cannot afford if you're going for top times.
If you're not comfortable casting Seryuu, you can cast stay on the right side of the screen and safely cast Four Beasts. If you do, try not to use moves that impede Maria's MP regen.
Hippogryph
To improve your chances of getting a quick kill, hold the Jump button after the uppercut, this will make Maria "float" for a little while, improving damage output from Four Beasts and the Book.
Skeleton Leader
Enter the boss room with a flying kick to trigger the fight as quickly as possible then just use two books while Four Beasts is still active and keep kicking him until the fight is over.
Karasuman
You can get a faster kill by using the Book and quickly doing the Dragonbreath Spell
Lesser Demon
You can either use the book with Four Beasts or throw two crosses from a specific spot.
Doppel 10
Possible to kill him with just 2 Guardian Knuckles, but requires getting lucky with crits.
Scylla
Wyrm - Cross is faster Body - Level 4 shot typically kills her, but if it doesn't you just need to use subweapon Video explaining how to do the Scylla "skip"
Cerberus
Use Byakko, Axe/Cross, and Flying Kicks
Granfaloon
Throw 2-3 Axes or Crosses and then Byakko. Alternate strat with Four Beasts.
Darkwing Bat
Two crosses into Byakko. Slightly faster kill.
Creature
Byakko is the safest option, but it's faster to do Guardian Knuckle combo.
Doppel 40
You can throw crosses for a safe kill, but the faster kill involves using Four Beasts.
Galamoth
Four Beasts and throw crosses. If you get a good pattern, the cross will hit both legs. You can also throw three crosses and do a kick for slightly more optimal DPS.
Medusa
Byakko is a guaranteed kill. You just need to set up positioning.
Akmodan II
Back dash into the wall and start throwing crosses
Fake Trio
Four Beasts then try to stunlock Sypha while throwing crosses at Trevor. Grant will eventually come down, but if he doesn't you can just do uppercuts to finish him off.
Beelzebub
Axe throws is the safe strat here. But Suzaku + crosses is faster.
Shaft
You just need to enter the boss room in a specific way to manipulate his pattern for optimal damage.
Bonus: Stylish Tech
These videos are meant to showcase techniques not typically seen in the speedrun, but still demonstrate what the character is capable of and could perhaps be used in a randomizer:
